Here’s the second installment of my Nail Blogger Secrets series (you can check out the first post on top coats here). Today we’re discussing the prep work before you slap on a colourful polish – it’s more important than the polishing itself! We’re going to cover the whole shebang of routines, including diet, moisturisers, cuticle removers, nail strengtheners, filing, and that mandatory first layer, the base coat.

A lot of what makes a mani look good is in the preparation. Not just when you sit down to paint your nails – like losing weight or fixing your skin, undoing damaged nails is a long game that requires a regular routine.
What’s in a routine?
DON’T PANIC. You don’t need to do all these things, and certainly not every day. Breathe!
That said, there are people who manage to do all these things and hold a steady job/raise multiple children, so it’s not as though you need to drop everything to devote yourself to the quest for the holy nail. Just incorporate them as needed.
1. Diet and supplements
2. Moisturisers
3. Removing cuticles
4. Nail strengthener
5. Filing and reshaping
6. Base coat
Let’s delve a bit deeper into each step – why would you need to do it, how do you do it, and what do you use?
Eat your nails better

Your nails are a lot like your hair – mostly dead, and once it’s peeking out above your skin, you can’t really “feed” it. And much like hair, your nails are a record of your health. Malnutrition, dehydration and disease can cause brittle nails and nail ridges. There are supplements that you can take if you think your diet isn’t good enough – in particular, biotin has a good track record in clinical trials for thickening brittle nails. This is a long-haul plan though, since it takes over 6 months to completely grow out your nails.
[Note: if your nails are very funny-shaped or have lots of abnormal marks, you’ll want to get it checked out by a doctor – it could be a sign of a nutritional deficiency or a chronic disease.]
Water is the essence of wetness, and wetness is the essence of beauty
6 months is an awfully long time for your nails to be bearing the brunt of everything you do – that’s why nail polish and gels can be good for protecting your nails. However, the most important thing for your nails is… WATER.
Your nails need to be hydrated to be strong while staying flexible. Water is also important for keeping the living skin at the base of the nail (the eponychium) supple enough to withstand trauma – damage to the eponychium can lead to abnormal nail growth.
Balms, oils, general greasy goodness
Fats and oils repel water, so a layer on the surface will trap water into the skin and nails. Just like with your face, you need water there in the first place to trap it successfully. If your skin and nails are dehydrated, you’ll need to add some water – moisturise after a shower, or use a water-based lotion first (look for water in the first three ingredients).

The skin around your nails is tough. To soften it up and discourage cracking, emollient-rich moisturisers are handy (heh) – look for dense, greasy products you’d be afraid to put on your face (except perhaps your lips). They come in a variety of different packaging, like big tubs, little tins and lip balm tubes depending on what texture you want and where you want to use them.
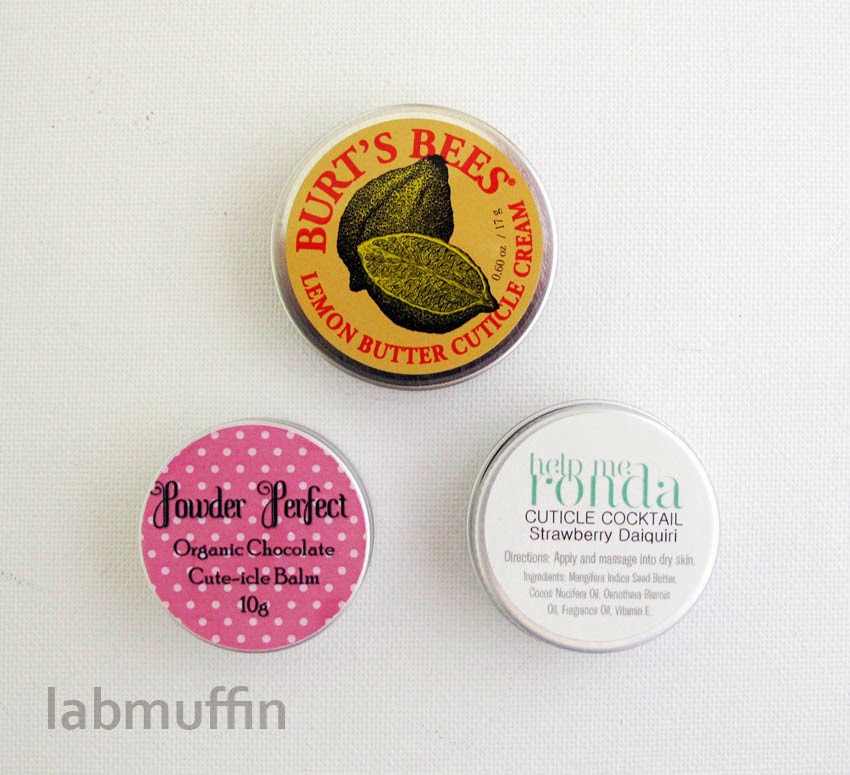
Popular balms
– Lush Lemony Flutter – a greasy, heavy-duty paste. If your tub is gritty, you can re-smooth it with heat.
– Burt’s Bees Lemon Butter Cuticle Cream – a lighter, lip balm-like product. See my reviews of these two and others here.
– Many indie options are available too.
– Lip balm contains many similar ingredients and works great on your cuticles.
– Many natural oils and butters work well too – coconut oil, shea butter, cocoa butter etc.
There are also a billion lighter hand creams available, for when you’d rather not leave greasy marks on everything.
Alternatively, some people prefer to moisturise after polishing. Oils applied with brushes are great while your polish is wet since they don’t require rubbing in.
Popular oils:
– CND Solar Oil, Island Girl Cuticle Oil (review here)
– Again, lots of indie brands sell cuticle oils
– Sweet almond oil is a commonly used DIY option
The main poopy thing about these oily moisturisers is that having them on your nails when you polish can make your polish adhere poorly.
Moisturise with remover
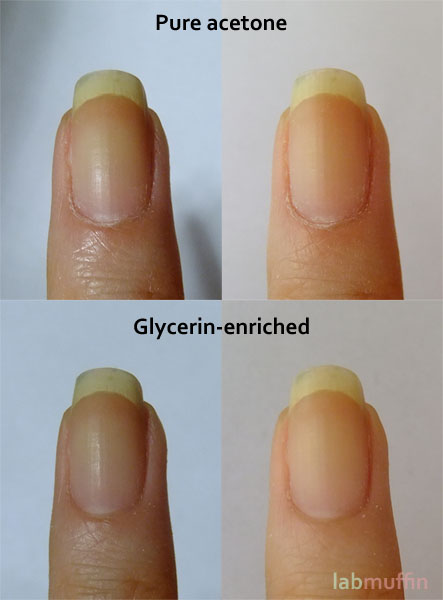
Nail polish removers contain solvents that strip your skin and nails of natural oils that would normally seal in water. Using a glycerin/acetone mix is a good compromise – the acetone removes polish quickly, while the glycerin stops your nails and skin from drying out. There’s a recipe for glycerin/acetone remover here, and it costs way less than expensive store-bought “gentle” removers, plus it both moisturises and removes polish more effectively than most.
You can find acetone in the hardware store, and glycerin (also called glycerol) in the pharmacy, where it’s often stocked in the laxative section. (Part of being a nail addict involves awkward situations. Think of the cashier raising his eyebrow at you as a baptism of fire.)
Stay dry to stay damp. Huh?
Ironically, if you want your nails to be hydrated, it’s best to not get them soaking wet too often. This means gloves while washing up and doing other wet chores.
Cuticle removal – to snip or not to snip?
Just like exfoliating your face skin, there are two ways to remove your fingernail skin – physically or chemically.
Physical removal requires tools like these:
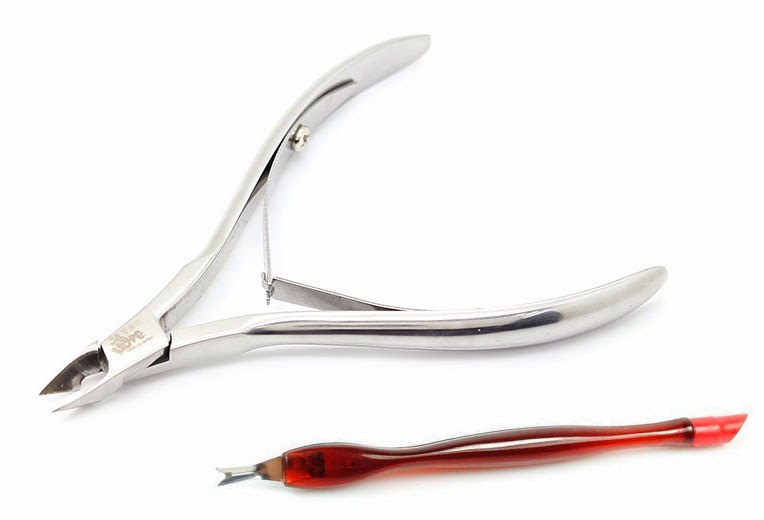
These are used to cut off dead skin around your cuticle and eponychium area, right next to live skin. As you can imagine, it’s easy to stuff up and if you do, it can damage the root of the nail or give you an infection (mmm… pus). There are many people who use these tools to great effect (in particular, trained nail techs), but I am personally quite wary of messing around with that area. I sometimes very carefully use the gouger to trim hangnails, but I mostly use it to shave down calluses.
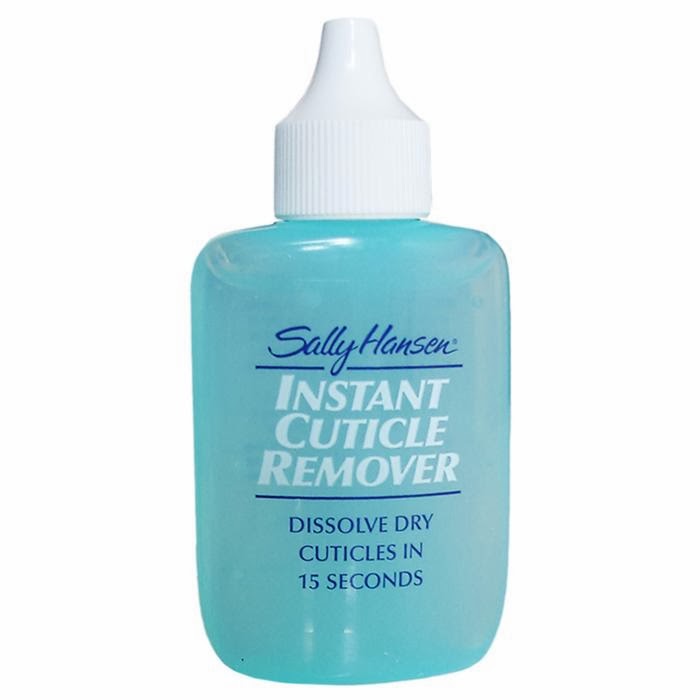
Luckily there’s a safer way – chemical cuticle removers. These are usually sodium hydroxide or potassium hydroxide (may be listed on the label as caustic soda, lye, caustic potash or potash lye), strongly alkaline (high pH) chemicals which dissolve dead skin (and live skin if you leave it too long, and furniture lacquer too if you spill it). Some popular ones are Blue Cross Cuticle Remover and Sally Hansen Instant Cuticle Remover. These are easily found at nail supply stores and online, but annoying difficult to find in standard Aussie pharmacies. Cosmo Cosmetics sometimes stocks Sally Hansen.

A quick summary of how to use cuticle oil:
1. Apply it to the cuticle area
2. Wait for the instructed time
3. Gently push the cuticle and eponychium back with a plastic or wooden stick (like the rear end of the gougey wedge above)
4. Rinse thoroughly and moisturise.
Doing this regularly will discourage the cuticle from overgrowing, leaving you a nice flat nail to paint (and if you’re lucky, you can increase the size of your nail bed too).
My best advice: Don’t try to cut a bitch if you’re new at this. If your cuticles are really bad, go to a nail tech with a good reputation and get them to fix you up, then maintain your cuticles at home with a chemical remover.
Call in the reinforcements
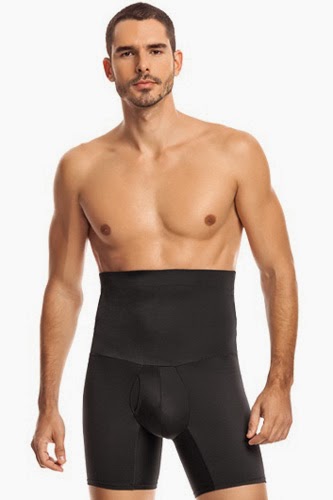
You’ve moisturised the crap out of your nails but they’re still grumpy at you – what next? You might need to turn to the heavy duty stuff – and by heavy duty stuff, I mean nail strengtheners. These are polishes containing specialised ingredients, that are applied directly to the nail either alone or under a manicure.
This series by all-round amazing fellow nerdy scientist/nail blogger (who is now sadly inactive) Loodie Loodie Loodie goes into detail about how the different types of strengtheners work. The main types of ingredients that can help you:
Formaldehyde – The only thing on the market that will permanently change the chemical structure of your nail. It’s a lot like superglue – it sticks your nail back together, mending splits and peels before they’re noticeable. However, just like sticking a rubber band back together with superglue, if you use too much, your nail will become inflexible and crack when you apply the slightest pressure. The trick is to make sure you cut back how often you use it before it gets to that point (easier said than done!).
Formaldehyde products are best suited for soft, thin, peeling nails. It’s one of the Big 3 chemicals in nail products, but the levels used in nail products are safe. However, some people are allergic to formaldehyde and it can be an irritant, so it’s best to avoid having it touch your skin if possible. And as with any nail products, don’t huff them! (You should be old enough to know better.)
Proteins – These are like a cast for your nail – they reinforce the nail while they’re on, but don’t make any lasting changes.
Moisturisers – These don’t do much more than the moisturisers mentioned earlier, but it’s nice to be able to apply them without worrying too much about effing up how well polish sticks to your nails.
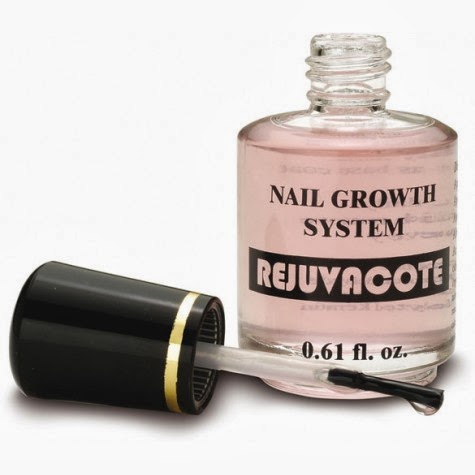
If you want to learn more about which chemicals you should look out for in nail strengthening products and other deets, go to Loodie’s excellent series – she covers it in incredible detail. Duri Rejuvacote is a ridiculously popular strengthener that contains a combination of all three types of ingredients above. OPI Nail Envy is another popular choice.
Shape it up, get straight
There are no hard rules as to which nail shape will suit you best. As well as the shape of your nail bed, you need to take into account whether all your fingers are the same shape, whether your nails grow straight, the length you want, how strong your nails are and whether it will stand up to your day-to-day life.
In general, the closer to your “meat” you keep your nails, the less likely they are to break. Long pointy claws are the riskiest, along with square nails (“losing a corner” is very common), while oval nails that follow the shape of your fingertip are the safest, but also the most boring. It’ll probably take some time to work out what nail shape works for you. But here are some general pointers (heh) to keep in mind:
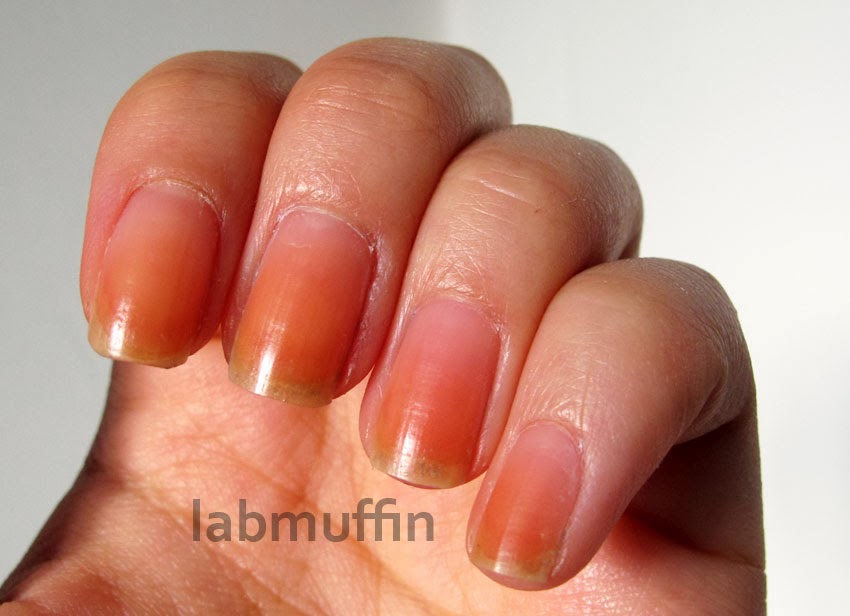
– Aim for a symmetrical shape. This sounds straightforward but can be tricky, since let’s face it, most of us are lucky to have one completely non-wonky nail. For me, the easiest way to symmetrise my nails is to orientate each nail with the free edge facing me like this:
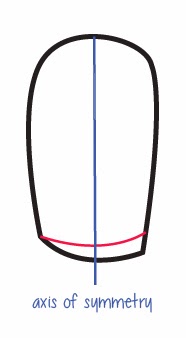
Then I picture an imaginary axis of symmetry that runs down my nail, in the middle of the two sidewalls. I aim to file at right angles to that axis – in this case, I place my file horizontally and file to the red line for a squoval shape. It requires a surprising amount of concentration to ignore the asymmetric meat, cuticle, nail bed etc., but once your nails are polished, you’ll barely see the wonkiness of anything but the painted nail.
– Leave your old polish on when you file. It’s much easier to judge the shape when the uneven white part is hidden and when your nails contrast with your skin.
– If your nail is super wonky, you may want to (carefully) file down the sides a bit to make them symmetrical – the ever-helpful Loodie has a how-to guide here.
– Aim for the same shaped edge across all your nails, and make the overall nail shape consistent and proportional – your pinky nail doesn’t have to be as long as your thumbnail if it’s a lot narrower.
– Good files: padded blocks, crystal files, cardboard files, spongy files. Bad files: those metal ones that come on nail clippers, concrete, bricks.
– The coarser the grit of the file, the faster it files down your nail, but the harsher on your nails they’ll be. If your nails are weak, thin or brittle, use a fine grit file. The bigger the number, the finer the grit. 240 grit is suitable for most nails. I personally use the grope test if a file isn’t labelled – if I can press my finger down hard on the file and drag it along the surface without much discomfort, it’s probably safe.
– If you start with a rough file, finish off with a fine file. This helps prevent your nails from peeling from the edge and smooths it out so it doesn’t catch on things.
– Don’t file your nails when they’re wet! This is when they’re at their weakest, and most peelie/chip/breakage-prone.
Buffing ridges
This is a controversial topic – should you buff out the ridges running along the length of your nail? I’m on the fence – if your nails are fragile and thin, then don’t buff, use a ridge filling base coat instead; if your nails are thick and problem-free, then buff away (slowly, gently and rarely).
You definitely need a base coat
Top coats may be optional, but a base coat will ALWAYS improve your manicure (unless you’re using a terrible base coat). Things base coats can do:
– protect from stains
– fill ridges and smooth out nails without damage
– strengthen nails (see section above)
– reduce chipping and tipwear
– make glitter removal easier (more on this in a later installment)
The tricky bit is, you need a base coat that works with both your top coat and your body chemistry.
On my nails, CND Stickey just doesn’t play nice with Seche Vite, but Orly Bonder works a charm, while on other people’s nails it’s the opposite. PVA base won’t stay on some people’s nails, while it won’t come off others. Duri Rejuvacote transforms many people’s nails into rock hard claws, but after prolonged use can make them break extremely easily (and some people are allergic to the active ingredient, formaldehyde, altogether).
Grab a friend, start buying base coats, and pray that you don’t have the same body chemistry. You may have noticed that 2-in-1 base/top coats aren’t mentioned – that’s because they’re pretty much universally crap, unless you’re on a tight budget, or don’t have space to store an extra bottle.
However, even with a base coat, things like this can and will happen, because it’s against the laws of the universe for our nails to be awesome in every respect:
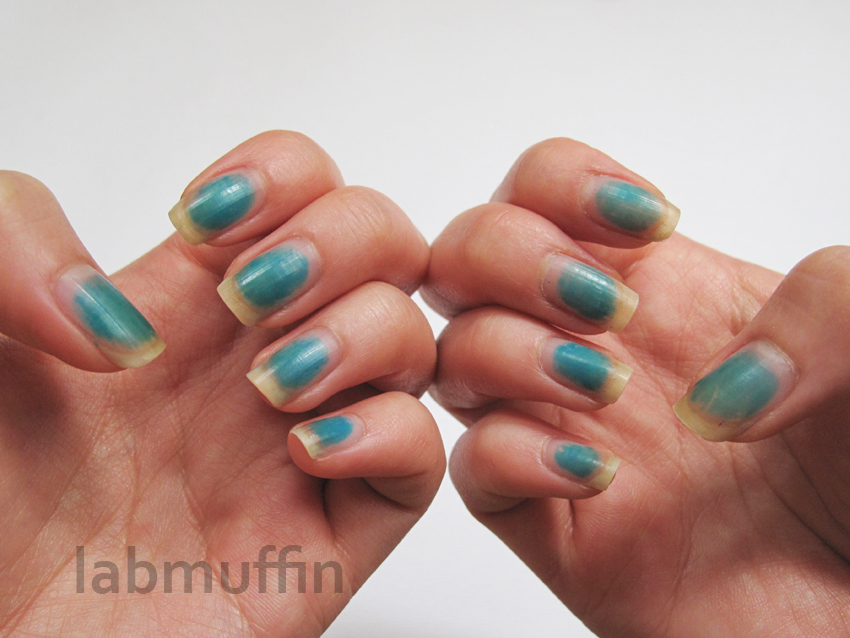
But a good base coat will make it less likely. There are a few things you can try for getting rid of stains, but whether they work depends on what’s causing the stain, and how deep it is.
What have I missed on nail prep? Add your tips in the comments below!
Next time, we’ll tackle the best secret of all – clean-up.
Nail Blogger Secrets for Pretty Nails
Part 1: Top coat the mother
Part 2: Prep that base
Part 3: Clean-up is your sneaky BFF
Part 4: Glitter isn’t normal polish
Part 5: Nail addiction on the cheap


AWESOME post! Definitely recommending it to my nail n00b friends. You had me with the Zoolander quote. 🙂
Thank you Rach!
Such an awesome post, looking forward to more in this series 🙂
Thanks Arathael, glad you liked it! 🙂
As usual, the Lab Muffin knocks it out of the park with an entertaining AND educational post!!! But perhaps the best part is you leave room for individuality and you don’t preach or talk down to your readers. Thank You! I’ve bookmarked this post, along with many others of yours. 🙂
Thank you so much! I am a big fan of diversity in beauty routines – there is just so much variation that there’s almost never a one-size fits all solution to anything, even though that would be really nice to believe.
Great post Michelle!
Lately I’ve been putting cuticle oil on my nails, rubbing it in, patting dry with a towel and starting a manicure straight away. I haven’t seen my manicures last this long before! I don’t know how it works for me – but it does. Give it a try! You want to try dry it off as if you were drying your hands from hand washing. You thoroughly dry but don’t mind if there are still wet parts. Can’t wait for more installments!
Thanks for the tip Mel, I’ll have to give that a go!
I love how serious in terms of contents your posts are and how funny in terms of the way you deliver your messages. While I did know most of the thing you mentioned it is always good to have a reminder from time to time for some points (like how proper nutrition matters).
Thank you! I think most of us nail addicts have come across all this info at some point, but writing this made me remember a lot of forgotten gems too 🙂
wow so much good info! lots of things i didn’t know!
I’m glad you liked it!
Love reading your posts on this topic! It’s nice with some science backing up all the claims, so that you know it’s not just myths or rumours 🙂 I learn something each time even though I might have read all of the facts before – at least it works as a reminder! And your presentation of the subject is great and fun 🙂
Thank you! It’s quite hard to find hard science on beauty topics that isn’t performed by an obviously biased company, so unfortunately it’s slim pickings, but I try!
Its a shame the Loodie Loodie Loodie blog is no longer active, I love your science related posts and would love to follow another blog like this!
However, this post is really helpful so thank you for doing it! Its so long and I hate to think how long it must have taken you to write and probably plan. Thanks for putting the effort in, its definitely worth it!
Loodie is amazing! I always end up going back through her archives whenever I dig for nail science.
Thank you so much 🙂
Can tell me how calcium nail hardeners fit into the picture? (I loved the great posts by you and Loodie.) Revlon’s Calcium Gel Nail Treatment Base Coat dramatically strengthened my flimsy nails.
P.S. I’ve never heard the term “stuff up” before!
There isn’t any way the calcium alone can affect the nail that I know of – the calcium ingredient in calcium gels is usually a small amount of calcium pantothenate, which does help your hair and nails if you don’t have enough of it in your diet and you eat it, but not if you put it on your (dead) nails. That Revlon treatment does have a lot of moisturising ingredients in it though, so that would certainly help!
I really love reading and following your post as I find them extremely informative and interesting. This post is equally informative as well as interesting . Thank you for information you been putting on making your site such an interesting. Nail clippers
Great post. This is very informative and I really learned a lot. I just checked the first post but it says about NOT FOUND, ERROR 404. Please fix it. Thanks again! Cheers!
Please notify me of new posts by email. Thank you.
My nails are thin and break at the sides. (I don’t have any peeling.) Which nail strengthener would be best for my problem? Thank you.
The part where you mentioned that undoing damaged nails requires a regular routine got me worried if I can maintain it. I’m a really busy and forgetful person and it would be hard for me to follow a routine. Maybe it would be easier for me to visit a nail salon for proper treatment.