This post is for Anthea (Nailed Obsession/Sayuri) who drew my attention to this problem. Hope you like it!
If you’re a fan of Lush’s cult cuticle balm Lemony Flutter, you may have discovered that some tubs of it are smooth as butter, while other tubs contain gritty sand-sized particles. Why is this?
As you might expect, Lush doesn’t intentionally make gritty Lemony Flutter. Unfortunately, it’s what happens outside their factory that causes grit to ‘grow’ – one of the main ingredients in Lemony Flutter is the excellent emollient (skin softening) ingredient shea butter.
 |
| Second ingredient – it’s not Jess’s fault! It might be Kale’s fault. |
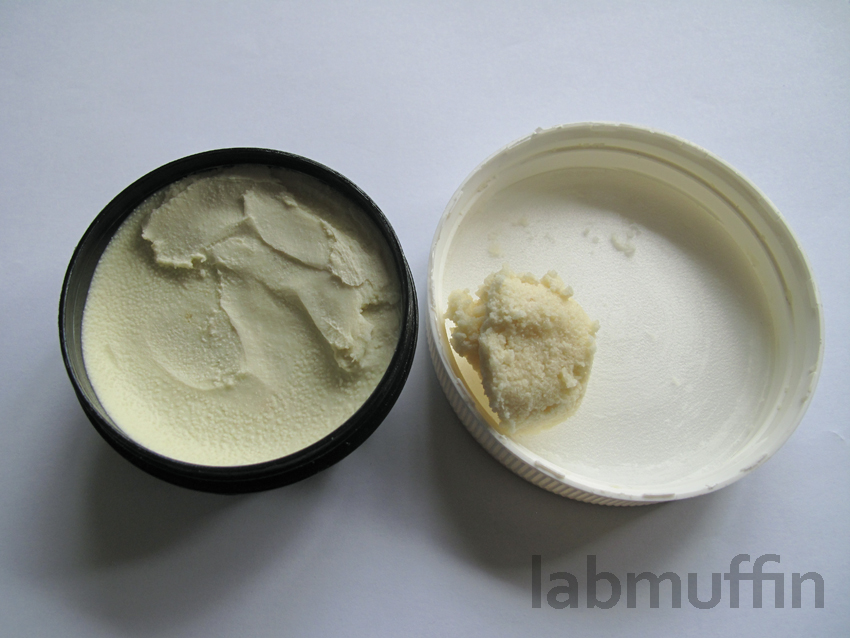
Shea butter is, frankly, a bit of a princess. She melts at 31-45 ºC (89-113 ºF, or the temperature of a hot day, or a handbag or car in the sun on a warm day) and, if you don’t pay her enough attention (stirring her constantly) as she cools, she dries into little round grains – in other words, if it melts during transport, or in your handbag that you left in the car, and you let it cool normally, it will go gritty. Here’s a photo of a little scoop of raw shea butter that I bought for DIY projects that, um, haven’t quite eventuated, next to my grainy Lemony Flutter – you can see how the grains look the same:
Unfortunately, if you want the full dry skin taming effects of the Lemony Flutter, you should be working the shea butter grains into your skin. This can be a bit of a pain, so if you’re sick of the graininess, you can re-combine the shea butter grains, using a bit of heat!
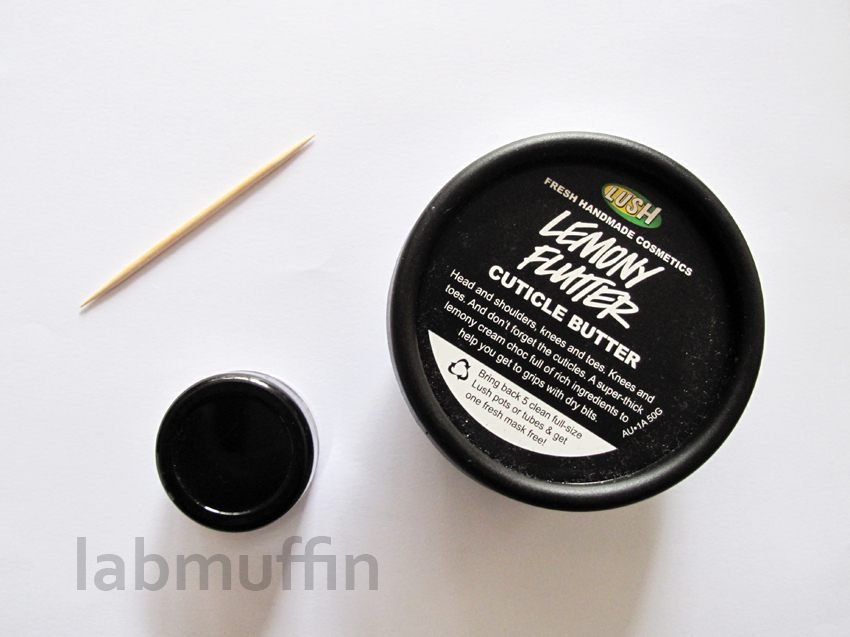
All you need is a heat source (I’m using a microwave, but you can also use a tub of hot water to sit the tub in, or if you’re very careful, a hairdryer), and a stirring implement (toothpick in my case). I would be hesitant to microwave the whole tub of Lemony Flutter, since microwaves heat large objects unevenly and there are lots of natural ingredients that might cook or burn in Lemony Flutter. If you’re doing the whole tub, sit the tub in a bowl of hot water and let it melt from the sides, making sure the water doesn’t leak into the tub (it can make it go off). Otherwise, I would recommend doing what I did – transfer a little bit of LF at a time into a smaller container to de-grittify (it’s more purse-friendly too!).
Here’s a bit of LF I scooped into a clean lip balm jar. To the de-grittifier!
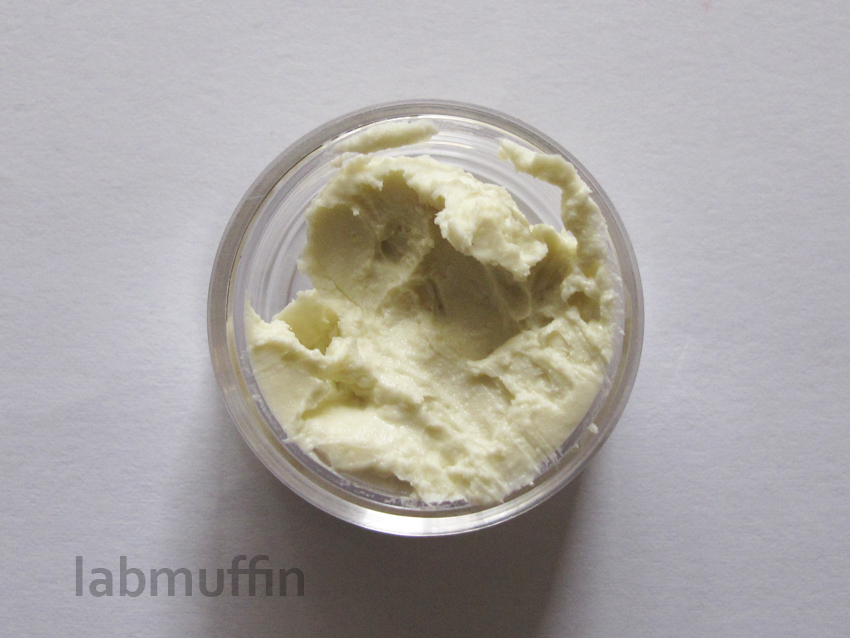
I microwaved the Lemony Flutter until there was a pool of melted stuff in the middle. It doesn’t all need to be liquid for this to work – stirring will warm up the rest. It took about 30 seconds for this little tub. Keep an eye on it!

Now for the elbow grease! Stir the LF until it’s all one smooth consistency. If there are still grains, you can heat it up a little more.
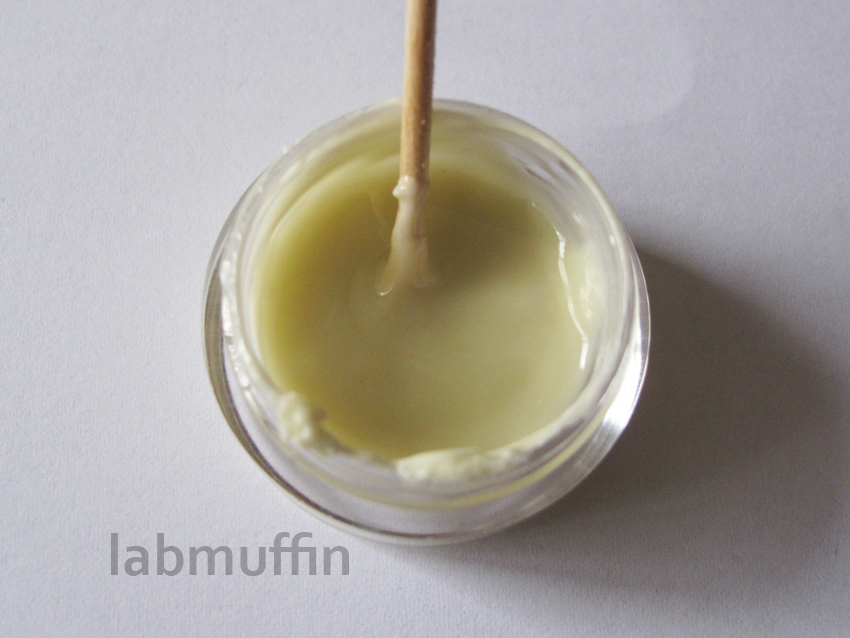
Let it cool, but keep stirring it every few minutes until it’s the texture of room temperature butter. Then you can leave it alone, and it’ll solidify into a smooth, ungrainy paste (if you’re impatient, you can whack a lid on and put it in the fridge or freezer – this will actually make it less likely to grow grains). Success! Check out how smooth it is:

And there you have it – how to restore your Lemony Flutter to its original smooth consistency. Of course, the easiest thing to do is to make sure it doesn’t melt in the first place, but sometimes it happens without you even knowing!


You are a genius!!! Thank you Miss Clever!! 🙂
Thanks Peita! 🙂
The grains have been putting me off buying LF, but now I will give it a go!
Hope it solves your issues! It’s still a bit thick and heavy for me, but sometimes I need the extra pampering.
That was very interesting. I didn’t know that about shea butter!!
Glad you learned something 🙂
I kinda like it a bit grainy though….am I a weirdo?!
Possibly haha! You’re certainly the first person to tell me that. Maybe this post will bring the freaks out of the woodwork…
Ah – so clever! (:
Thank you!
It’s totally Kale’s fault, the bastard.
I hope he never sees this, poor Kale! But we needed a scapegoat.
Awesome as always! ! For the record I just bought a non-grainy Kale though 😛
Kale must love you!
Usually for me, the grainy bits tend to melt with the heat from my hands as I use it, but lately my hands have been so cold so it’s hard to work it into the cuticles! I will definitely try this 🙂 Thanks Michelle!
I’ve found the same thing too!
Mine was grainy when I bought it, I thought thats how it was meant to be! But the same for me as Elissa – the grainy bits usually melt anyway
It didn’t quite annoy me so much in summer, but in winter I tended to scrape off the grains and throw them in the bin : That’s what finally got me off my ass to do this tutorial, actually!
Amazing post! While I don’t use this product at the moment, this is SO handy to know! You are amazing! xx
Aww thanks so much Jasmine! xx
Hi! I’ve been reading since you started at Polish or Perish, but I’m a terrible commenter. Anyways, just wanted to say that this is brilliant–thank you for the tutorial! My jar was only about half full, and I don’t have any cute little containers to split it up like you do, so I microwaved the entire thing for two 10-second bursts, at 60% power each time. It worked perfectly!
Nice, glad it worked so well! I was hesitant to recommend microwaving the Lush containers because I wasn’t 100% sure the container or labels or something might melt in the microwave, glad you worked that out for me 🙂
I just did this! Buttery smooth lemony flutter 😀 I forgot how good it is when it doesn’t have little lumps in it!
The grains in mine are less annoying now that it’s warmer, but not having them there at all is the best!