I’m pretty lazy with my haircare and I’m bad at sticking to routines. But I also bleached my hair so I could play with pretty colours, which dramatically increased the effort involved to keep my hair looking decent. So in the last few years I’ve been trying out a lot of haircare hacks – these are the ones that’ve changed my routine.
They’re all pretty low-effort, and they land at lots of different price points, so hopefully there’s something in here that makes a big difference for you too!
The video is here, keep scrolling for the written version…

Crocodile clips
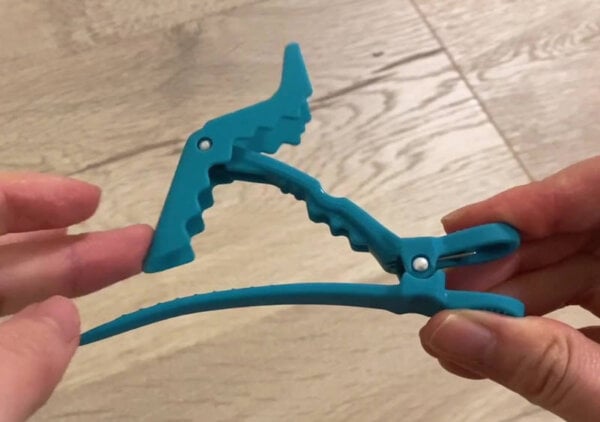
I don’t know why it took me 30 years to discover these! They’re called crocodile or jointed clips, and they have this cool mechanism that expands to grab a big chunk of hair or whatever else you need to clip (I don’t know your life):
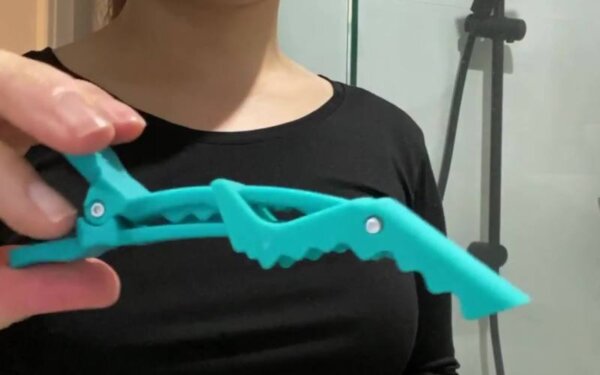
I have a lot of heavy hair, so I’ve just had decades of weak little clips struggling to hold onto my hair. Maybe I just didn’t love myself enough to look for a solution.
One of these crocodile clips will clamp onto more than half my hair with no dramas. They cost less than a dollar or two each, depending on how fancy you go.
I use these for pretty much anything hair-related, and honestly most things that require a quick clamping:
- clipping up my hair in the shower when I’m letting the conditioner soak in for longer
- using hair treatments
- dyeing my hair
- clipping up my hair under shower caps
- clipping up my hair at home when it’s hot
- keeping a towel around my partner’s shoulders when I did his quarantine haircuts
- clipping my clothes back for videos
- holding back curtains

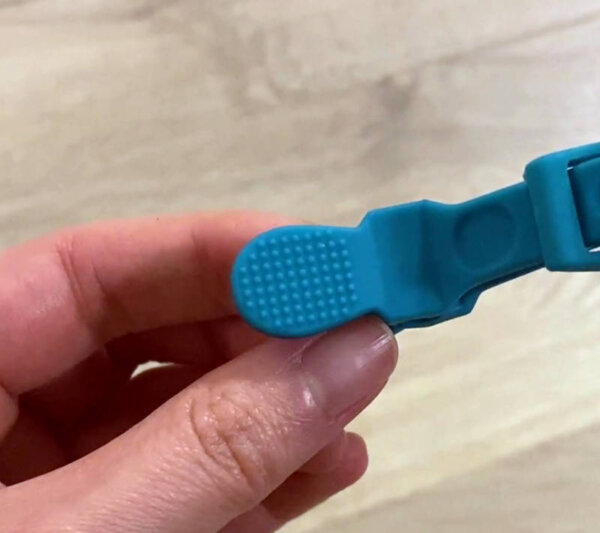
I’d recommend getting rubberised clips that aren’t too smooth, because they grip hair a bit better and they’re easier to hold onto when they’re wet. I would also recommend getting some with bumps on the finger grips so they don’t slip out and launch across the bathroom when your hands are covered in conditioner (learn from my fail).
They’re also pretty robust. It might be the brands I bought, but I’ve only managed to break one of these the whole time I’ve been using them (in the rocket launch incident of 2019). My hair used to snap teeth off claw clips all the time.
This is a highly recommended quality of life upgrade – treat yourself to a one dollar clip.
Cornstarch as dry shampoo
I know a lot of people love how convenient dry shampoo is, but I find that the sprays can make my scalp feel really irritated, and a lot of the scents are a bit heavy for me. But I do have a fringe and oily skin, which means it gets gross and greasy, and I just start looking like I never grew out of my Nine Inch Nails phase (which is kinda true).
I did use a non-spray dry shampoo once, and it turns out the main ingredient was starch, but it was impossible to find it again. And then one time I was putting on my translucent powder, which is starch based, and I thought… what if I just dust it on my fringe? And it worked!
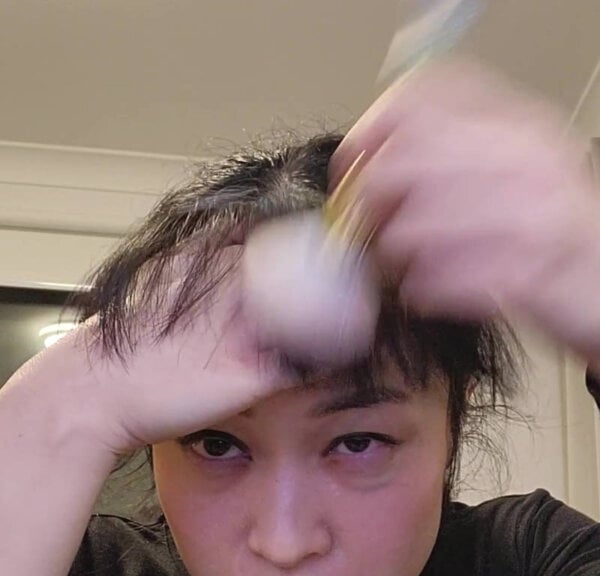
The cheaper version is just using cornstarch from the grocery store with a fluffy brush. If your hair is dark then it can look a little grey, but once you brush it and pat it a bit it goes away (maybe test it out first when it’s not right before an important event). Some people also use it at night to give it time to settle down.
A sub-tip: don’t use dry shampoo too much, and stop if you get any sores or breakouts. Dry shampoo doesn’t replace actual shampooing, and too much gunk and buildup on your scalp isn’t good for it. (I think this is actually the reason some people say particular products are making their hair fall out.)
Shampoo scalp, condition below ears
This is a tip that I think most people know: try keeping your shampoo above your ears, on your scalp, and use hair conditioner from around your ears downwards.
The hair near your scalp doesn’t really need conditioner. It already gets a lot of oil from your scalp (which is why it needs to be shampooed).
It’s also less damaged because it hasn’t been around for as long – unlike your old and bitter ends, it’s still pretty smooth.
Plus, most modern shampoos have small amounts of conditioning ingredients in them like polyquaterniums. These leave a very light protective coating on your hair that can smooth it, protect it from more damage and reduce static. Unless your shampoo is making your hair very squeaky, it’s probably got some conditioning that should be enough for most people’s roots.
Related post: The Science of Hair Products: Shampoo and Conditioner (with video)
So conditioner near your scalp might not be really adding much to your hair experience, but it can cause build-up on your scalp and irritate it.
Now with the lengths – they’re far away from your scalp, so they don’t get much oil. The main reason your hair gets dirty is because of this oil, and all the dirt and dust that sticks to it like a really gross cult (I’m sorry, I’m not having a good analogy day). So they might not need to be cleansed with shampoo (although shampoos with other functions like purple shampoo might still be handy).
So for most people, directly shampooing the lengths just dries them out and can make them more damaged without much pay-off with cleaning. The shampoo trickles down as you rinse can be enough, plus conditioner also contains cationic surfactants that can do a bit of cleaning.
You might need more shampoo if you use a lot of styling products, and you might need more conditioner if your hair is rougher at the roots, but for a lot of people I think this is worth trying – my scalp used to have so much build-up before I stopped getting conditioner near it!
And you end up using less product, so it costs you negative money.
Reverse conditioning
If you need even deeper conditioning, you might want to try reverse conditioning. This is where you put conditioner on the lengths of your hair before you shampoo, then shampoo focusing on your scalp, then rinse everything out and add a bit more conditioner if you need.
The idea is that the conditioner protects your hair from the shampoo, so it’s like a more intense version of the half-shampoo half-conditioner tip.
Microfibre towels
Microfibre towels are amazing for drying hair. They’re towels that have very small fibres, so they have a large surface area, and that means they suck the water out of your hair much faster than a regular towel.
My favourite towels for this are the Aquis towels. I’ve been using these same towels for 6 years ever since they sent a bunch to me for a sponsored post, but I still use the same ones because they still work great, and I haven’t really tried other options.
Related post: How do Aquis Towels work? Science and review
Vanessa of Goals to Get Glowing tested a bunch and there are also cheaper options that work great. She reviewed a bunch of turbans which are a really handy all in one option, but I actually prefer the regular towels because I like being able to control how the ends get twisted, since my bleached ends are really fragile. So I put it around my hair, squeeze it a bit to soak up the water, then wrap the towel around my head and keep it in place with – you guessed it! – a crocodile clip.
These are also a lot lighter than a traditional towel so when I don’t get a crick in my neck, and it doesn’t lurch off my head and rip out my hair when I move it too fast.
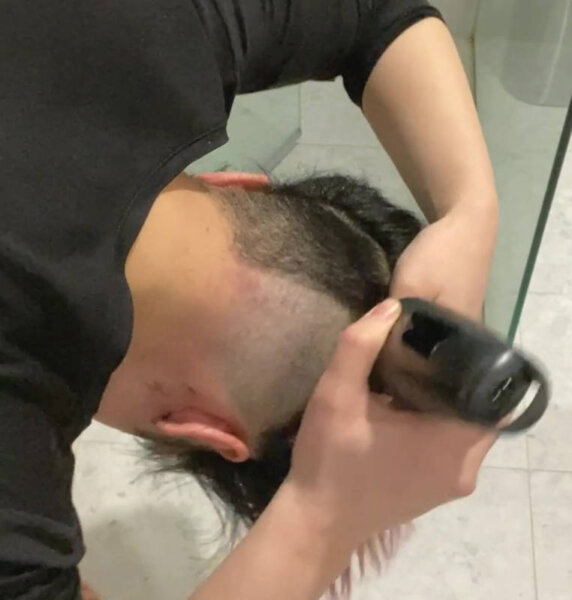
Nape undercut
This has actually been a really big game-changer for me. Like I said I have a lot of hair, so one day I just decided to cut off about a third of it.
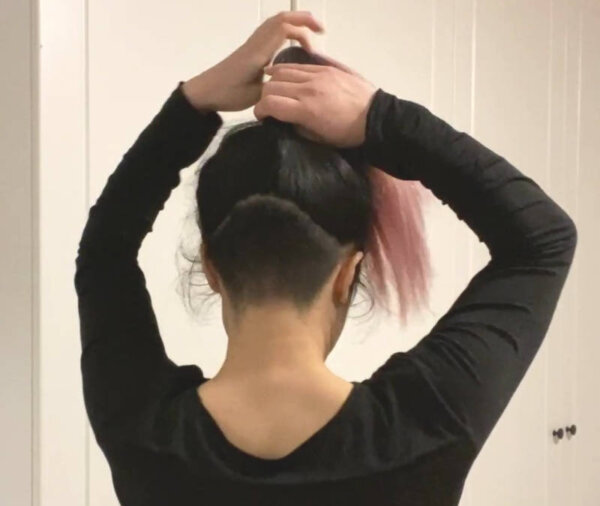
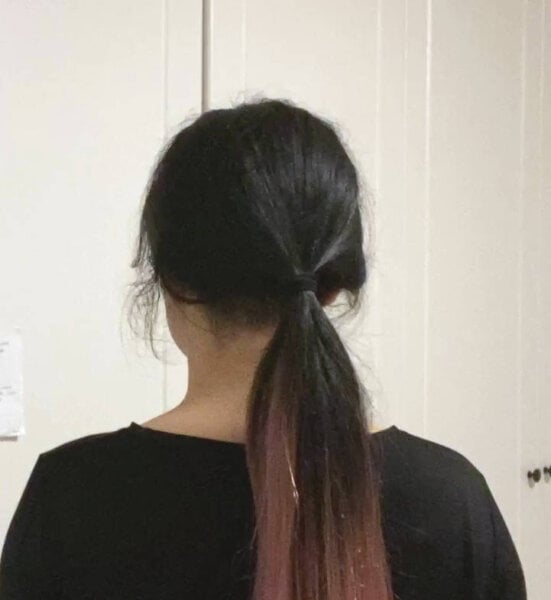
It’s not really noticeable when I have my hair out or in a low ponytail, and most people don’t realise I have it.
But it’s made such a big difference! It’s so much faster to dry my hair. When my hair’s wet, my head is a lot less heavy. I also used to get a lot of knots when the strands coming from the base of my neck rubbed against my back, so that’s all gone, and it’s a lot cooler during summer as well. Also I had so much hair that when I left it out I looked a bit like Grug, and just violently hacking off a whole bunch underneath actually gives it a more manageable shape.
My biggest concern with the nape undercut used to be that I would need to get someone else to help me cut it all the time. But hair clippers are actually quite easy to use just by feel, and it’s really difficult to cut yourself with them. So I can mostly keep the undercut shaved just by feeling where to shave, without accidentally cutting off a whole bunch of long, expensive hair (every time I accidentally cut some off, I think about how much it cost to bleach it – it’s something like 1 cent per hair).
It’s not super neat around the edges because I try not to get any long hair, so I sometimes get someone to help me neaten it up. But since I don’t really wear my hair up a lot, my shame is all hiding up the top.
Hair dryer with features you want
I’m so sorry – I hate hacks that are just like “buy this expensive thing”! But this made a big difference for me: getting a hair dryer with the features I wanted.
There are a lot of hair dryers out there and my wants probably aren’t the same as yours, so if you spend a lot of time drying your hair, I really encourage you to do your research and don’t just buy a hairdryer someone recommends unless it matches your wants too.
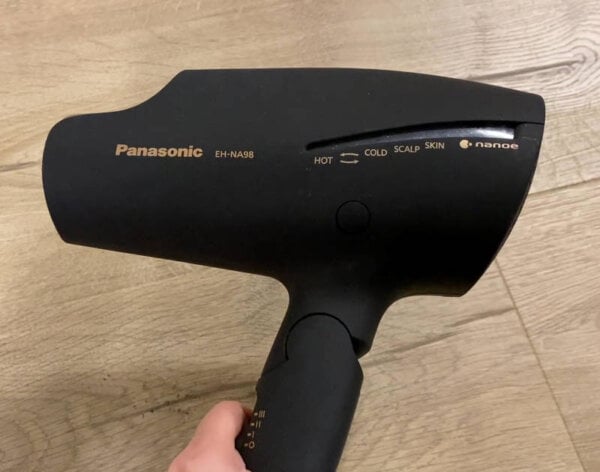
I’ve tried a lot of expensive hair dryers but this Panasonic Nanoe EH-NA98 hairdryer just kind of blew my mind. I did a sponsorship with them for this hair dryer a couple years back, but this post and video are not sponsored and I have no obligation or extra incentive to mention it – but I am because it has really changed my mind about hair dryers.
The things I really like about it:
- The nozzle is designed to create air flow that separates your hairs out so it dries quickly, so you don’t have to be constantly spreading your hair out with your fingers – I mean I still do it, but I have to do it less, which sounds like it doesn’t make a big difference, but it does.
- It has a scalp function which is a setting that’s as hot as it goes without hurting your scalp – I’m sure it’s too hot for some people but it’s pretty much perfect for me and I can zone out without burning my scalp or my fingers.
- It feels light, there’s no wrist pain – I highly recommend doing this to any hair dryers you might want to buy.
I’m not extra enough to pack my own hair dryer for holidays, but every time I’m using a hotel hair dryer and my hair is going everywhere and slapping me in the face like hot wet noodles, and I’m burning my fingers I get reminded of how good this is.
DIY coloured conditioner
If you have brightly coloured hair like mine, it’s generally done using semi-permanent dyes. It fades out over about 7 washes and doesn’t damage hair, so you can change your hair colour all the time and it’s quite fun.
But the problem is, it washes out, and when it’s faded it tends to look pretty bad. So you have to go get it redyed a lot, or dye it yourself at home. I dyed it myself every second weekend or so when I first started, and it took a couple of hours, so it ended up being more effort than I could really handle.
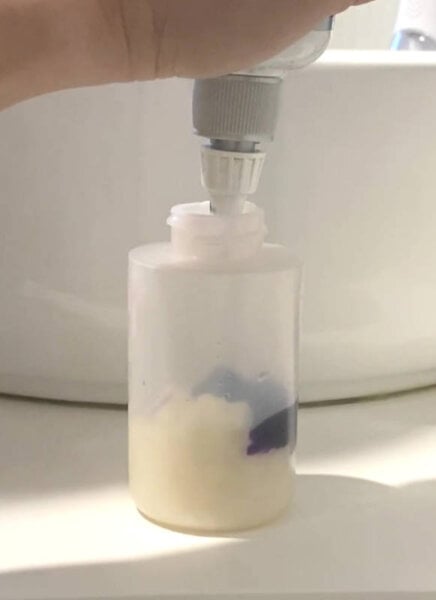
Then I realised you could buy coloured hair conditioners that add a bit of dye to your hair every time you wash it, and after using those for a bit I realised (in my Year of Realising Stuff™) I could make my own – in any colour I wanted, with a conditioner that I liked. You just mix semi-permanent dye into the hair conditioner of your choice.
This isn’t entirely risk-free because when you make your own, there’s a chance that you’ll mess up the preservative system and end up with mould growing in your product.
It’s relatively low risk since it is a wash-off product, and it’s a hair product so it doesn’t stay on your skin for long. But I would still recommend not mixing up too much at one time. I only mix up enough for about a week, and I make it darker than I need and mix it with my regular conditioner in the shower right before using it (although to be honest usually that’s because I’m bad at mixing the right amounts together, so there’s an upside there).
Having this also means I can wash my hair every day (which is what my scalp likes) without worrying about the colour ever fading too quickly.
Use conditioner as a hair mask
You don’t actually need a separate hair mask. Hair masks have the same core ingredients as conditioner, but the main difference is that they’re usually thicker, and stay on your hair more easily.
So if you have a conditioner that works well for you, you can use it as a hair mask – although it probably won’t stay on your hair quite as well in the shower, with all the extra water. You can try wrapping your hair up in clingwrap or a plastic shower cap like a little dumpling to keep it all together – and clip it with a crocodile clip.
(I swear I am not being paid by Big Crocodile Clip.)
Silk pillowcase
I didn’t really believe in silk pillowcases at first. I thought they were a bit of a gimmick and people just liked them because they felt nice. But I’ve actually found that once I started using them I could really tell when I didn’t use one.
With the silk, my hair doesn’t end up quite as crunchy when I wake up compared to cotton or linen. I think that maybe I move my head quite a bit when I sleep, and my hair gets rubbed into the pillow, and when the pillowcase has more friction it tends to put kinks in my hair that make it feel crunchy (the kinks go away when I wash my hair). It tends to be worse when I go to sleep with damp hair, and it still does this if my hair ends up stuck behind my back against my regular sheets.
I use Slip, Shhh, Silvo and Lilysilk pillowcases
Related post: Silk for Skincare and Haircare (with video)
I’ve also found that using a silk scrunchie has been good as well. The hair strands can slide around a bit so it doesn’t pull on my scalp and make it sore, and it’s really good for sleeping in. (I have to sleep with my hair in a ponytail, otherwise it starts spreading out and trying to colonise my partner’s side of the bed, it’s a problem.)
Watch out for MI and MCI
Methylisothiazolinone (MI) and methylchloroisothiazolinone (MCI) are two preservatives that are pretty common allergens these days. Around 1.5% of people are allergic to them, a lot of people don’t know about them, and they’re actually kind of hard to avoid.
I’m personally allergic to them. They give me a really itchy and irritated scalp with bumps and pimples, and annoyingly they, are also super common in shampoos – most anti-dandruff shampoos I looked at had them.
If you feel like your scalp seems really grumpy with particular products, it might be worth checking for these and seeing what happens when you stop using products with them.
They’re also in a lot of laundry detergents – if I wash my clothes with the wrong detergent I get super itchy when I wear them, and it always takes me a few hours to remember I have an allergy, so laundry allergy is another hint. And of course you can go to a dermatologist to confirm, or do more testing if it isn’t those.
I hope some of these tips were helpful! What are your top haircare tips?
Many products mentioned were provided for editorial consideration or as part of sponsorships, which did not affect my opinion. This post also contains affiliate links – if you decide to click through and support Lab Muffin financially (at no extra cost to you), thank you! For more information, see Disclosure Policy.


Is there an anti-dandruff shampoo/conditioner or something soothing for scalps that you’d recommend without those ingredients in them? (I’m having awful scalp issues and wondering now if all the products I’ve been buying to treat it might be making it worse!) 😉 I can obviously check out my own bottles, but if there’s a product you have found and love, I’d be grateful to know about it!
Unfortunately the only ones I’ve tried so far that work well are Australian!
I use the As I Am Dry and Itchy Co-wash (and more recently the shampoo as well), which doesn’t seem to have these ingredients. I’m not positive whether or not I have this allergy as I haven’t noticed sensitivity to laundry detergents, but for whatever reason, it works much better for me to reduce scalp itchiness, sores, and dandruff than anything else I’ve tried, including other zinc shampoos and prescription nizoral. I like to let the co-wash sit on my scalp for a couple minutes. Good luck!
Thanks for the heads up around the preservative. I am allergic to the preservative Sodium Benzoate. It is in a ton of food items like salad dressings, sauces etc. as well as a lot of personal care products. It took me quite some time to figure out what was causing me to break out in rashes on my hands and feet. Apparently 1 % of population is allergic to Aspirin and then they are likely sensitive to this preservative as well. Just thought I’d share
Love the dry shampoo hack. Been doing the same for a few years now but with rice flour as I noticed it was the main ingredient in most dry shampoos. Have you tried this before and noticed any appreciable difference compared to corn starch?
Thanks!
I haven’t tried rice flour before, not sure about how it compares but I would guess it’s pretty similar!
Keep up the good work. Your information is valuable. Thank you.
Thank you so much for these tips!
Here is a hack from my hairdresser: If you put hairspray on right after you wash and style, it will actually keep your hair clean and fresh longer (I had avoided hair spray for many years because I thought it would increase how often I had to wash it).
My hack: Before I choose how to style my hair, I check the weather report for the next couple days. If it’s going to be dry with no humidity I blow it straight. If it’s going to be rainy or really humid, I use a diffuser to turn my waves into curls. Might as well go along with what the weather is going to encourage my hair to do anyway.
I would love to know what brand of semi-permanent dye you use to mix with your conditioner? Such a neat trick but there are so many would like to know if there is one that is known to work well.
I’ve used a few different ones – there’s a brand in Australia called Tintation that I really like, I’ve also used Schwarzkopf and L’Oreal Colorista recently. I pretty much use anything that comes in a single tube that doesn’t have to be mixed, but you might want to test it on a few strands of hair first if you’re not sure!
Arrowroot powder better than
cornstarch. Doesn’t lighten hair as
much. Apply w makeup brush. To
distribute, line hairbrush w cheese
cloth or gauze; absorbs oil.