As promised, here’s a tutorial for the DIY nail decals I used for my Android nail art – this time, it’s for my birthday nails (I’m turning 26 today!).
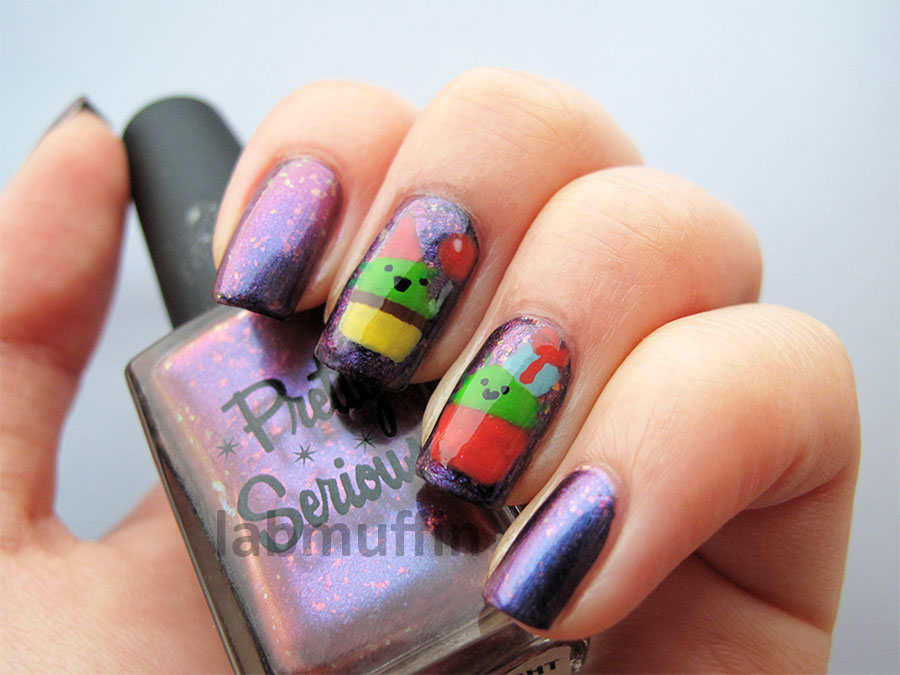
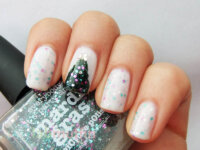
First, here’s my mani – Pretty Serious Naughty Night Shift Nurse over black, with party cactuses (from Facebook messenger, designed by Jayde A Cardinalli) on top:
And here’s how I did it:
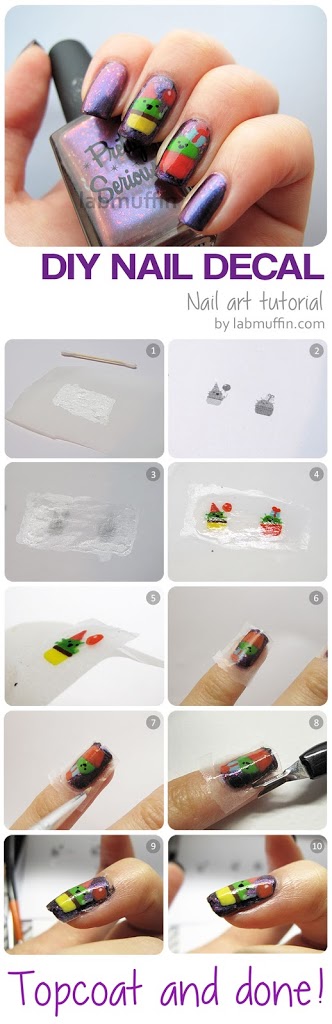
What you need:
– Baking paper (the waxy white stuff)
– Clear polish
– Polish and brushes for art
– Printed designs on a piece of paper (optional)
– Clean-up brush (I’m using a 000 brush from an art store)
– Cuticle trimmer or tweezers
– Base coat, polish and top coat
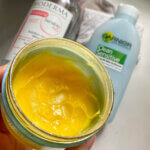
1. Paint a couple of layers of clear polish onto the baking paper. Make sure you’ve painted enough to cover your nails! Let it dry.
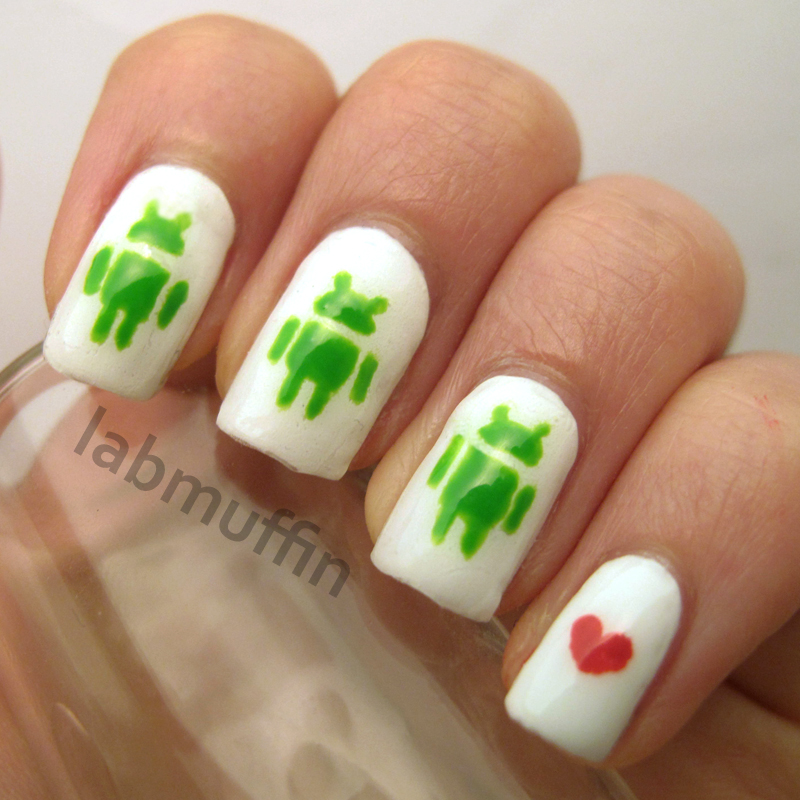
2. If you’re using designs, have them handy – this method is really useful if you want a row of things that are all the same(ish) size and shape, like in my Android design:
3. Place the polished bit over the design, and use your nail art tools to paint your design. Yes, you can use both hands, hurray! And you can do things with your hands in between coats!
4. Cover it with top coat. Wait until it THOROUGHLY dries. If it’s not dry, it won’t work! This means waiting for hours, or if you’re paranoid like me, overnight.
5. Cut the paper to size and peel off your decals – they should come off pretty easily. If they tear or crumble, your top and base clear coats weren’t thick enough. The clear bits will be a bit cloudy at the moment.
6. Trim the decal to slightly larger than your nail, then paint your nails like you normally would, minus top coat. While the last coat is still pretty wet, smoosh the decal onto the nail. If it’s wet enough, the polish will cling to the decal and the cloudiness will disappear.
7. Clean-up time! Dip your brush in acetone and run it over the edge of your nail to soften the clear polish.
8. Using the sharp metal edge of your cuticle trimmer or tweezers, poke holes along the side of the nail. Don’t worry about being too neat at the moment. The excess clear polish should separate easily – if not, go at it again with the acetone.
9. (I switched nails because my ring finger ended up being too neat for the purposes of this tutorial!) Messy! Grab your clean-up brush and melt the edges of the decal into the polish. They’ll meld together quite neatly. Also clean up whatever clear polish you’ve melted into your skin.
10. Clean! You can leave it here (and enjoy how super touch-dry your nails are right now), or add top coat if you want to smooth it out even more.
I’m loving this technique – it frees up both hands, and you don’t need to do everything with one hand for hours while waiting for your design to dry. It also means you don’t need to do your whole mani in one session – once the decals were dry, it took me less than half an hour to get it on my nails! Super efficient, plus it solves the whole plain-dominant-hand dilemma!
This technique was inspired by Tammy of Oh My Gosh Polish, who paints polish onto baking paper and punches out shapes with various shapes of hole puncher, but since shaped punchers are hard to find in Australia, I adapted it to freehand nail art. You can do the same thing with acrylic paint, or tape manicures, or any other nail art that you’ve been too scared to try with one hand.
Happy Birthday!!
Jac x0x
Thanks! 🙂
they’re so cute! I don’t think I have the patience for making my own decals 🙂 Happy Birthday!!
I.C.O.N India Giveaway
Buying decals is probably easier, but I love having a custom option… I can make cheese decals! Or other things. But I think I’m mainly excited about cheese.
Happy birthday! And what a cute tutorial! I must definitely try this one day 🙂
I hope it’s okay to do this, but I recently updated my make up blog sale with a ton of new make up and lower prices and (hopefully) better pictures. Most items are brand new and I’m shipping from Sydney.
Some brands include: Urban Decay, theBalm, Le Metier de Beaute, NARS, Addiction, Shu Uemura, MAC, elf, NYX, Korean brands, Japanese brands, Rae Morris and more! Please take a look! http://sites.google.com/site/muablogsalebroken/
Oh my gosh, all that stuff looks amazing!! Especially the lippies and brushes! But I am far too poor to be enabled right now *sheds single tear*
Happy Birthday gorgeous lady! Yay we are almost-twins!
These little guys are so cute, I def need to try this.
Hurray! Next time I want to try that party thing too 🙂
Happy Birthday Michelle!! Hope you have a great day and eat lots of food!! I love your mani!
P.s I buy my shaped hole punches from office works! 🙂 They have stars, hearts 🙂
I ate so much! 😀 I’ll have to check out Officeworks, but that place is terrible for my wallet. Stationery is my non-cosmetic catnip!
Happy birthday lovely! I hope you are being spoilt rotten!
I absolutely love this idea for nail art – especially the ability to create it in advance! Thanks for sharing the tutorial!
I’m always late for my nail art challenges because freehand just takes too long, I can actually plan and space it out now 🙂
great tutorial, this is adorable! happy birthday 🙂
Thank you!