I feel like I’ve been on fire with DIY nail things lately! Here’s my latest discovery – how to successfully use permanent marker on your nails.
I’m not too shabby with a fine brush (years of weighing out micrograms in a lab will do that to you), but I can’t count the number of times I’ve wanted to just throw down my brush in frustration and just scrawl all over my nails in permanent marker. But as all nail addicts know, top coat will smear your hard work into an unrecognisable mess, and if you don’t use top coat, the marker will rub off within hours.
Turns out there’s a cheap, easy solution! It’s…
The reason that top coat smears marker is that markers contain pigments suspended in organic solvents, and your top coat is full of (you guessed it) organic solvents (in particular ethyl acetate and butyl acetate). So the top coat will quickly dissolve the ink up again! The solvent (liquidy stuff) in PVA glue is water and, as you’ll know if you’ve ever had the misfortune of having someone draw on your face while you’re asleep, water doesn’t dissolve permanent marker. So I figured, if I placed a protective PVA layer (applied with water) between the marker and the top coat, there’d be no smearing… turns out I’m right! (Love it when that happens!)
What you need
– dry base colour
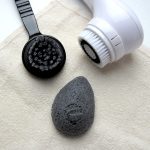
– permanent marker (it has to be waterproof for this to work)
– PVA base (the same stuff you’d use for a peel-off base)
– top coat (Seche Vite in my case)
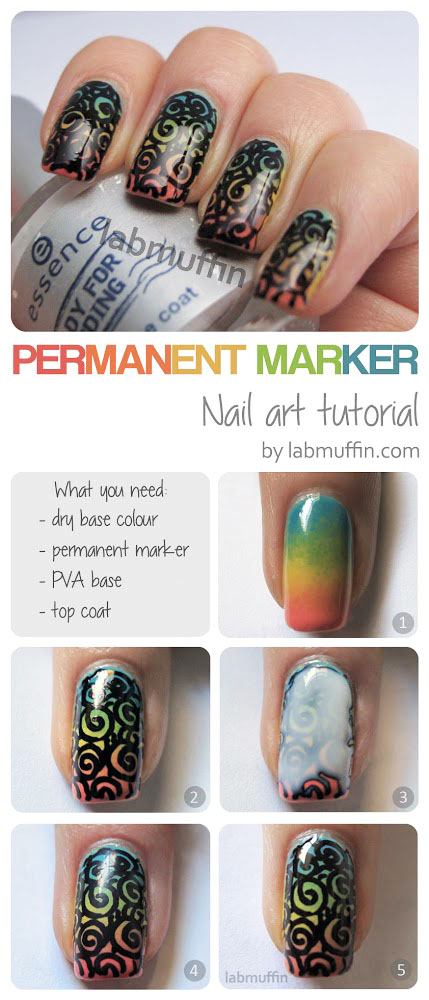
1. Make sure your polish is dry enough to be dent-proof.
2. Draw on your nail with permanent marker. Let it dry (it can still smear if it’s not completely dry).
3. Cover the design with PVA base. Make sure the whole design is covered, and that the PVA doesn’t shrink and expose any areas. It tends to cling to the markered areas.
4. Wait. PVA takes a while to dry, but it’s obvious when it’s done, since it goes clear. Watch some TV or something. I recommend Archer. Make sure it’s COMPLETELY CLEAR – if not, the water will stay trapped between two solid layers of polish. A little cloudiness is ok, but it’ll take ages to disappear after it’s trapped.
5. When it’s all clear, go ahead and add top coat. Voilà! Nail art success!
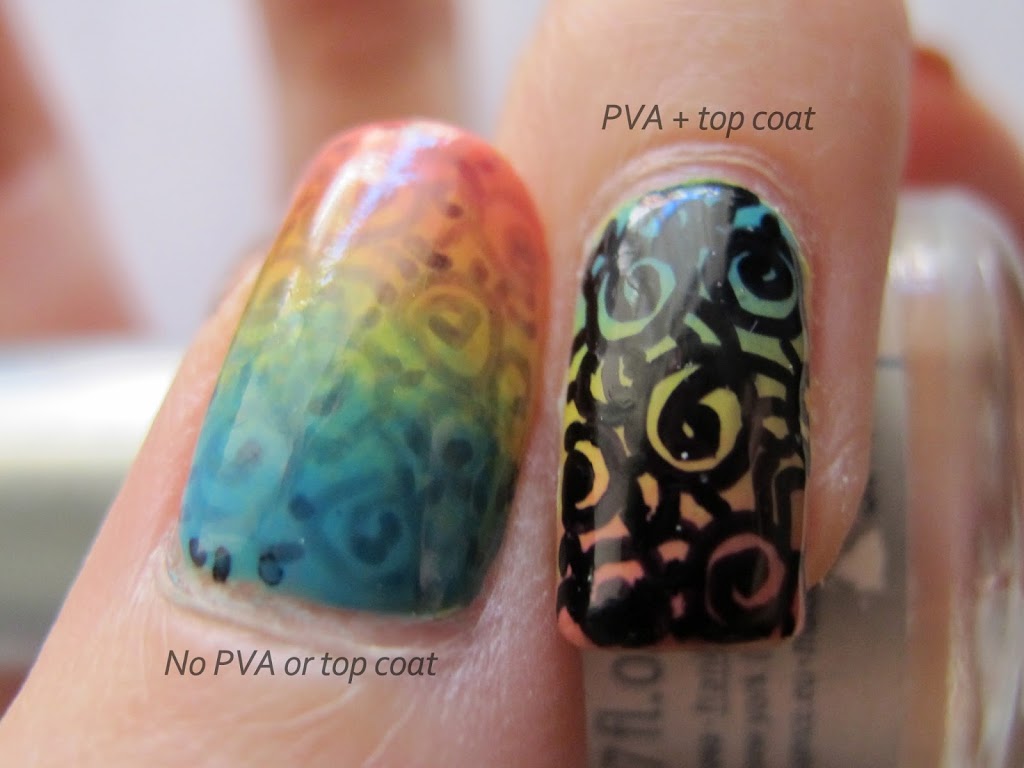
Now you might wonder, why bother putting on top coat at all? Here’s a comparison of my unprotected thumb nail art after 12 hours and a properly sealed design:
And here’s a comparison of what happens if you don’t PVA before adding top coat:
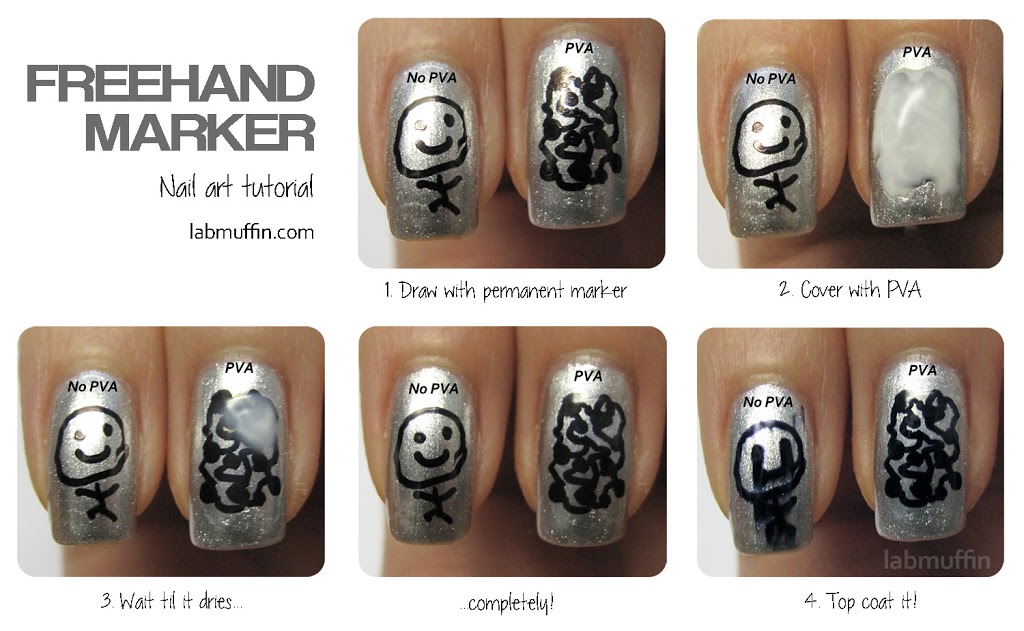
Poor Mr Happy! (I’m not entirely sure what sort of overall design concept I was going for here. In my defence, it was late and I was tired.)
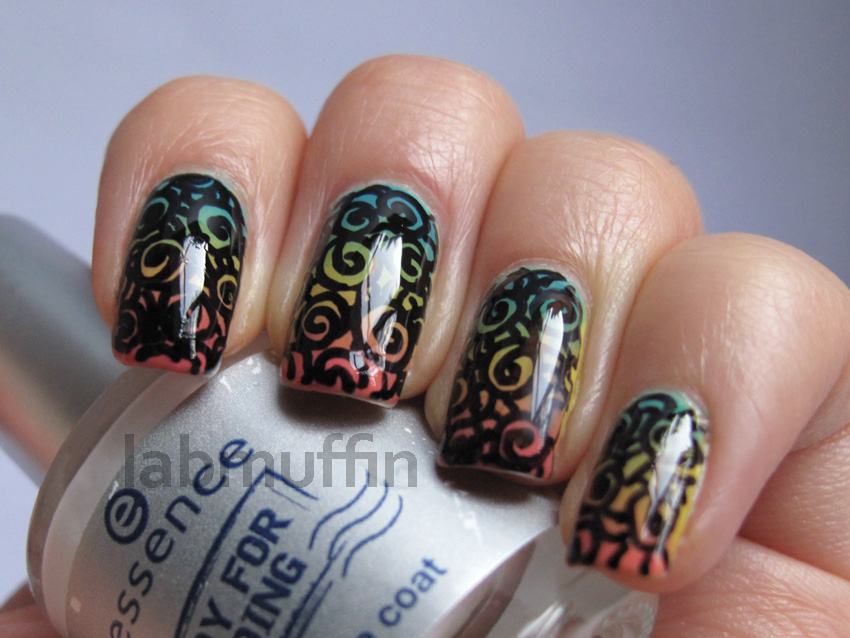
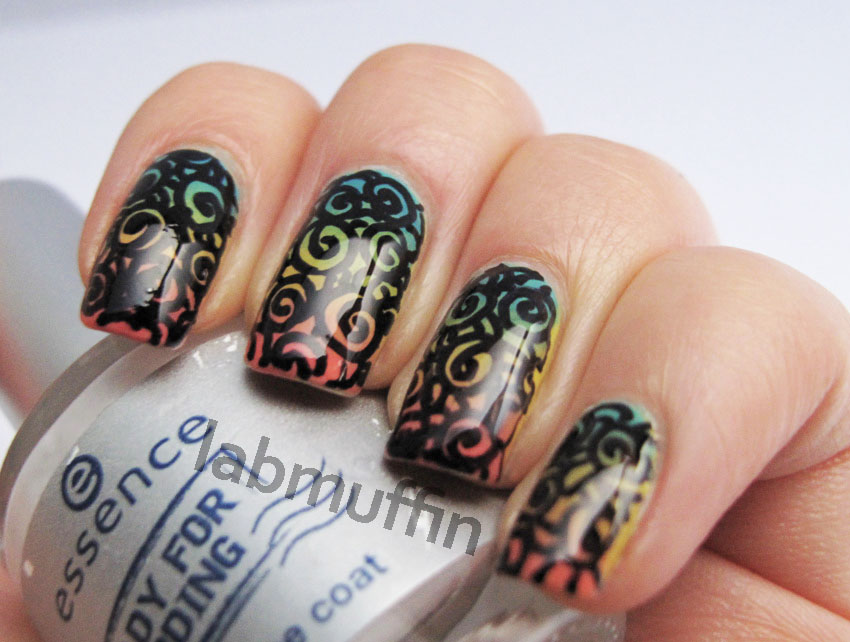
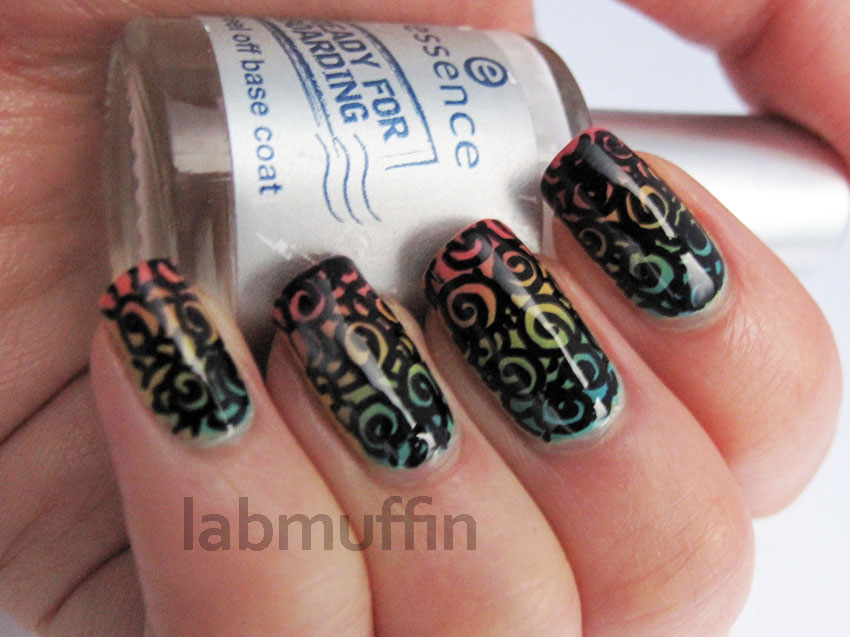
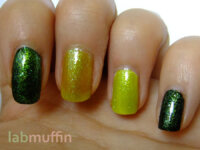
I’m really happy with the final look! It looks like something I could’ve achieved with stamping, but I really like the ability to have a completely unique design for each finger.
So if you thought awesome nail art was beyond your abilities, think again! 🙂


Great job Michelle!!!!! I am so going to give this a whirl.
Alice from one nail to rule them all uses a ballpoint gel pen all the time to draw designs on her nails and she just lets her nails wait a reasonable amount of time then just applied top coat as per normal without smudging!?
lets her nails dry for a reasonable amount of time***
Yes, I’ve seen that! Those gel pens are water soluble so they don’t smear as much with top coat, but sometimes the amount of smearing will depend on which top coat you use. I actually have a water soluble marker that works with one and only one top coat, but it still spreads a little if the top coat takes too long to dry.
genius! You are an awesome mad scientist/chemist!!
You’re a genius! You deserve to be immortalised in the nail art hall of fame. I’m taking a trip to officeworks to stock up on permanent markers tonight!
Also, that Mr Happy after top coat is going to give me nightmares 🙁
Thanks! Poor, poor Mr Happy.
Ahh, thank-you! I have a ton of different colored sharpies and was trying to figure out how to use them as nail art pens without all the smearing!
Woohoo! Looking forward to seeing what you do! 🙂
Wow!!! This mani is so pretty. I so love the color combos and design. It really looks so pretty with PVA and top coat. You def are a genius when it comes to nail arts.
Thanks!
This is really awesome! I can’t wit to try this out! xx
Hurray! Hope it works well for you 🙂
That is so awesome. I will definitely try this…when my nails grow out. haha. Now we’re going to see so many more beauty buffs stalking the aisles of stationery stores.
– Mary
I think some designs look amazing on short nails! 🙂
Mr Happy looks like he is crying after top coat!
I didn’t expect us all to get so emotionally attached to poor Mr Happy! 🙁
Hahaha, that’s exactly what I thought! Poor Mr. Happy.
A couple of things – 1, I am totally going to go at my nails tonight with a permanent marker (what would we all do without your scientific brain solving all our nail art dilemmas?) and 2, Archer is hilarious!
You’re too kind! Archer is my default nail painting background TV 🙂
Very clever! I agree with natalia – mr happy is weeping!!!
I feel so guilty for Mr Happy now… argh!
This is awesome Michelle! I still haven’t gotten around to using PVA on my nails..*lazy*
PVA is really for lazy people… I barely use remover now, and I can’t work out if that’s great or terrible for my nails.
Such a cool idea – thank you!! Its just really nice to see Chemistry knowledge applied in such a different way, I really love this blog!
It’s nice that there are actually useful applications for my knowledge, so much of what I worked on was decades from actual applications that this feels much more rewarding 🙂
You’re a genius and you do a fab mani too!
Awww thanks! 🙂
you. are. a genius!! i love this!
great tutorial! I’ve always wondered why more people didn’t ‘just draw’ on their nails! I’m going to have to give this a go, thanks 🙂
You have smarts Michelle 😀
That’s fantastic. Thank you
This is great! Now I won’t have to simply hold my breathe and hope my designs don’t smear after using permanent marker!
Too cool! You’re such a super duper smarty pants!
Wow, now this we say creativity and talent, I must say designs are just awesome. That’s good that you don’t need PVA before adding top coat.
I’ve never heard of pva glue but a quick google kind is eludes that Elmer’s glue all might work. Does regular Elmer’s glue work for this or do you need the actual pva glue? This is GENIUS. I just live in rainy Portland and don’t want to leave the house… hence the lazy girl nail tutorial. Thank you SO much.
Yep, Elmer’s glue works! 😀
Awesome.
Can I use indelible markers? People frequently employ a type of writing instrument called a “indelible marker”! To be more precise, these pens are created with specially designed ink that is difficult to remove. The majority of people today call these writing instruments permanent markers.
I think that should work too!