Recently I was asked to be a bridesmaid for one of my best friends. Of course I accepted! 😀 For her hens event, we decided on a DIY pampering weekend in a country cottage. To keep costs down, we wanted to try some homemade skincare projects.
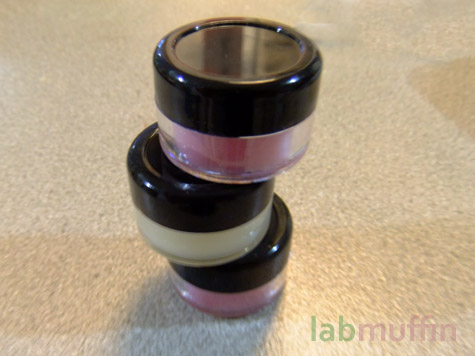
The easiest pampering activity I could think of is making homemade lip balm. These were my test runs:
Recipe #1: Super-easy basic lip balm
This makes enough for two 5 mL (0.15 oz) screw-top containers.
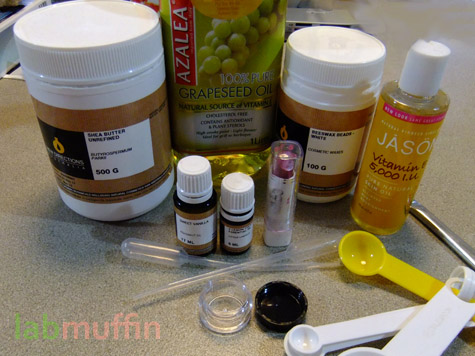
1.5 tsp beeswax pellets
3 tsp grapeseed oil (most recipes use sweet almond oil but this was easier for me to find – most oils that are liquid at room temperature will probably be fine)
lipstick for colour (optional) – for this one I only used a sliver, about the size of three grains of rice (it’s so hard to think up a good comparison!)
about 6 drops scented oil (I used cold-pressed lemon essential oil)
few drops vitamin E oil (as an antioxidant)
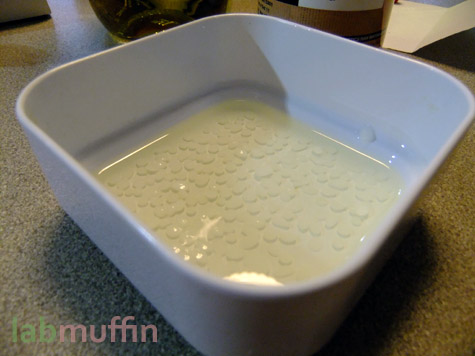
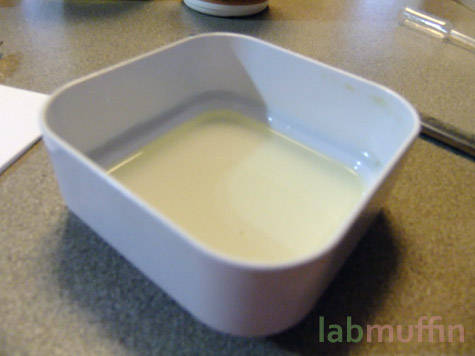
1. Combine beeswax and oil (and lipstick if using) in a microwave-safe container. Microwave on high for 30 sec at a time, stirring or gently shaking in between, until everything is liquid and uniform in colour (for me this took 4-5 goes). Beeswax melts at 62 to 64 °C (144 to 147 °F), so the container will be a little hot to touch, so take care! However it does cool quickly, so if it sets before you’re ready, give it a quick zap in the microwave.
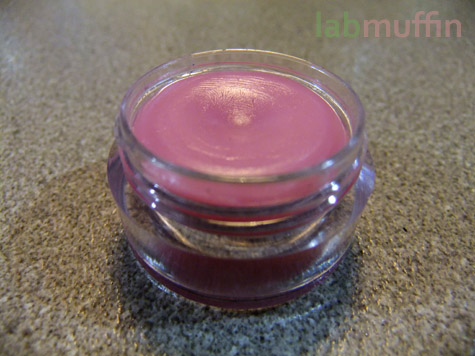
The colour of the lip balm will lighten as it solidifies.
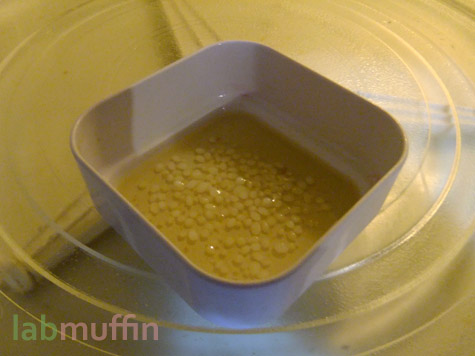
2. Add scented and vitamin E oils. Since these will be a room temperature, you’ll probably get some of the lip balm solidifying around the cold droplets, but a gentle shake should turn everything liquid again.
3. Pour into containers and allow to cool.
The lip balm solidifies rapidly as it cools, so you need to work quickly through steps 2 and 3. You can re-microwave for 10 seconds or so, but you might boil off some of the volatile scented oil.
This balm is relatively hard, the same texture as a tube of lip balm, but still soft enough to apply lightly with a finger.
Although I quite liked this lip balm, it wasn’t as nourishing as I wanted. So I replaced ½ tsp beeswax with shea butter for my second run:
Recipe #2: Extra-nourishing shea butter lip balm

This makes enough for two 5 mL (0.15 oz) screw-top containers.
- 1 tsp beeswax
- 0.5 tsp shea butter
- 3 tsp grapeseed oil
- lipstick for colour (optional – I didn’t use any for this one)
- about 6 drops scented oil (I used sweet vanilla fragranced oil)
- few drops vitamin E oil
Instructions – as above, with shea butter added in the first step with the beeswax.
The shea butter melts well before the beeswax, since its melting point is 30 to 35 °C (86 to 95 °F).


This one is slightly more nourishing than the first balm, but it’s not a huge difference. I was really impressed by how good the first lip balm was, given that it was so easy and only needed two ingredients!
As the lip balms cool they shrink to give very professional-looking dimples in the middle.
And that’s it! I think my quest to find an easy DIY pampering project was quite successful, although I’m going to experiment with decreasing the solids to make a softer balm next time.
(When I get access to a good set of scales, I’ll work out costs etc. )

Such an easy recipe! Do you know one for cuticle cream? 🙂
This works as cuticle cream too – just add more oil/butter and less wax to make it easier to apply!
I’d forgotten about this. Thanks for answering. 🙂
this is so interesting! too bad i have an overload of lip balm. one day i might just make it a gift out of these.
Yeah, I’m giving these away – I prefer stick balm, pots are too fiddly for me! I might try pouring this recipe into sticks though, if I ever get around to buying them…
Castor oil is the secret ingredient for nourishing lip balm! Try just a bit (1 tap or so) in your shea butter blend.
I REACHED THE END OF YOUR SKINCARE POSTS!!! Thank you so much for these <3
CONGRATULATIONS!! 😀