
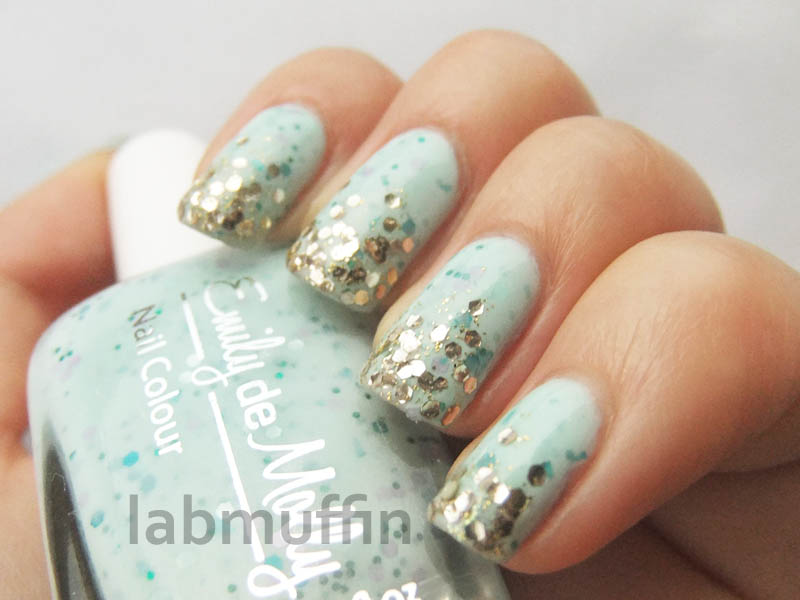
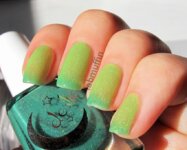
A lot of people have asked me how I do my chunky glitter gradients (for examples, see here or here or here or here or here). I’ve always done them using cotton buds (or Q-tips or cotton swabs, whatever you want to call them). The main advantages of this method, in my opinion, is that it’s pretty foolproof, you have lots of control over where you’re placing the glitter, and you don’t end up with lots of glitter base making one end of your manicure noticeably thicker than the other.
What you need:
– a chunky glitter (I’m using Peita’s Polish Zebration, a black-and-white glitter)
– a handful of cotton buds
– a base colour
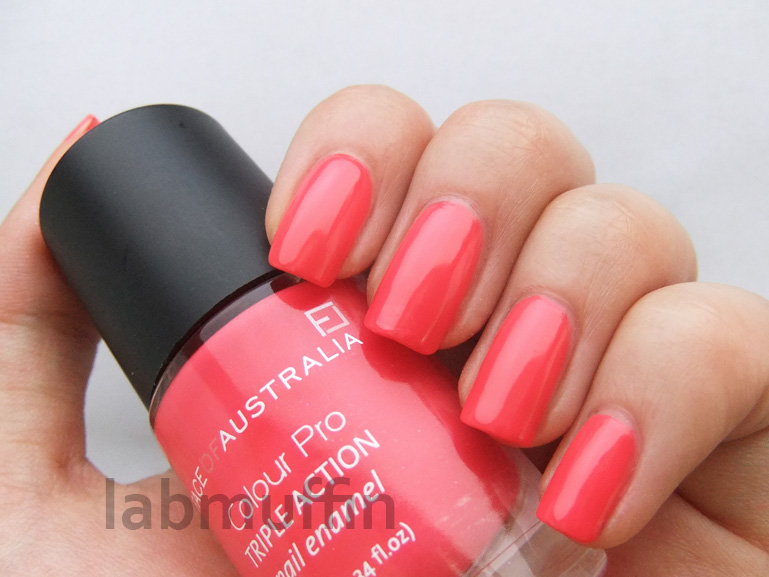
1. Do your base colour. The base colour doesn’t have to be completely dry – here I have Face of Australia Show Off, a gorgeous neon coral creme that’s perfect in 3 coats, and I waited about 15 minutes before applying glitter.
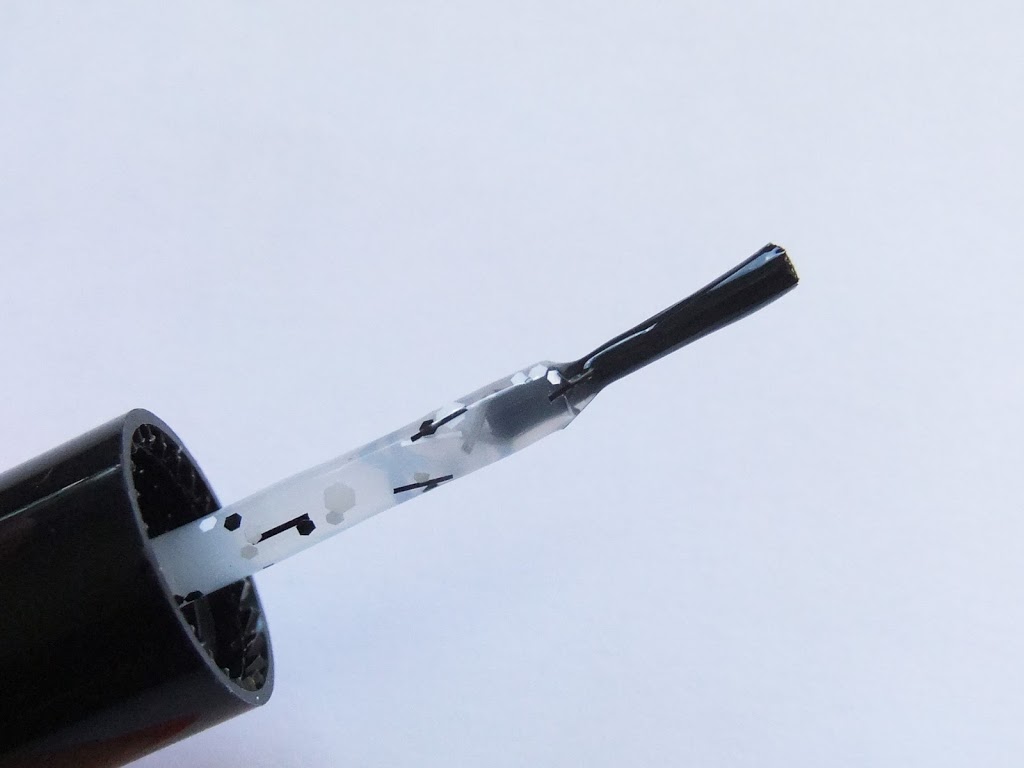
2. Swirl the brush of the chunky glitter around in the bottle so the stem picks up some glitter. Depending on how dense the glitter is, this can be fiddly.
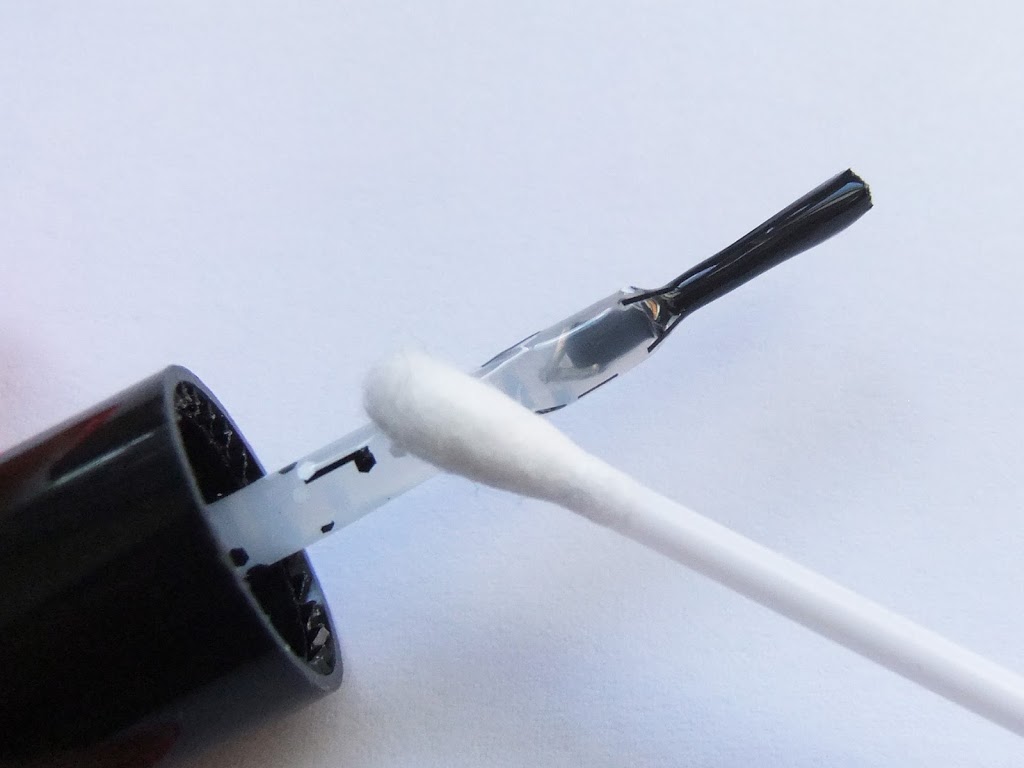
3. Take your cotton swab and use it to swipe a few glitters off the stem. Don’t pick up too many at a time – try to avoid getting too much of the clear base on your bud.
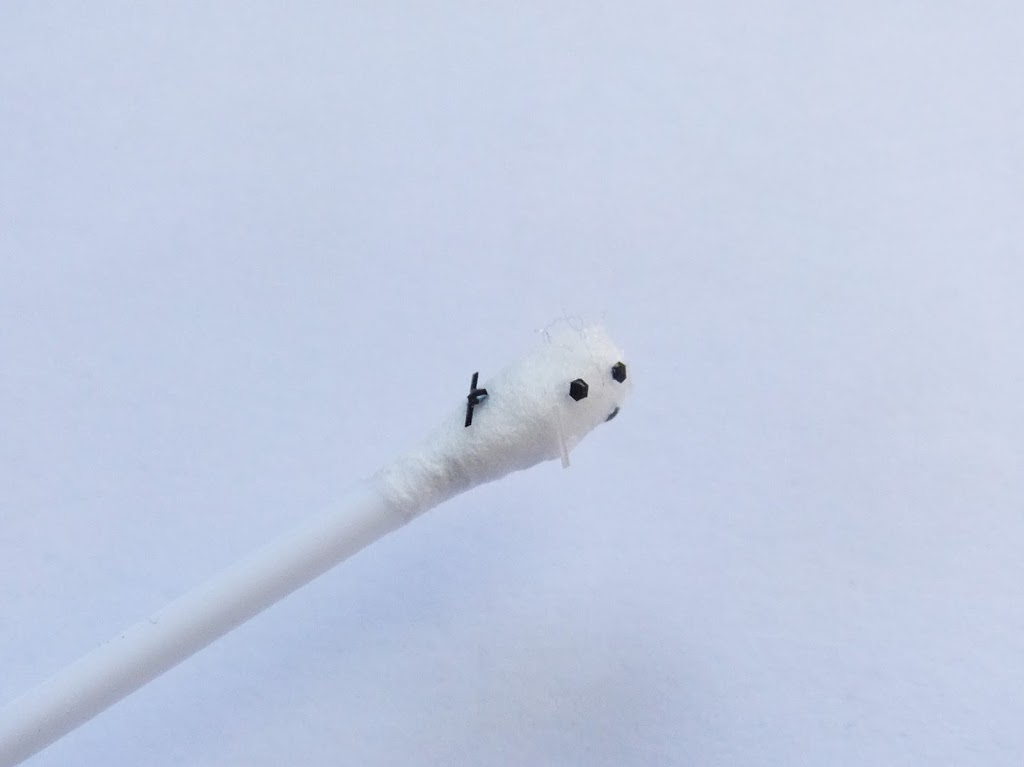
4. Line up your glitter and where you want the glitter to go, and tap it gently on your nail. Since there’s a little bit of the clear base on the glitter, it should stick to the base colour after a few gentle pats on the nail. Repeat until you have the pattern you want.

5. Check for furries! Some bits of cotton bud will come off onto your nail – you can carefully remove these with tweezers if you want, but usually they turn clear after you add topcoat. (This doesn’t work as well with black cotton buds!) If the bud gets too fluffy, it can get hard to work with.
6. Add topcoat, and voila! Glitter gradient!

Have you tried this technique before? How do you like to do your glitter gradients?
Thanks for the tips! This is a great idea. Also the glitter gradient you did with Zebration is gorgeous!
Thanks! Hope it works for you too 🙂
i have always used a bit of sponge to do my gradients 🙂 good tips for a quick one !
I can’t get sponges to work for me with glitter gradients – they’re great for normal gradients though!
i think i’ll use this technique next time as there appears to be less waste than with the sponging method.your nails are beautiful by the way
Thanks! 🙂
Awesome tutorial!!! 😀
Thanks! 🙂
I haven’t tried this method yet. Thanks for the tutorial! 🙂
Good luck if you do try it! It’s impossible to eff up 🙂
This is great!! Thanks for doing a tutorial!! I’m definitely going to try it soon!!
-Anna
makeupandmasala.blogspot.com
Good luck – show me what you come up with! 🙂
I always wondered the best method for not having a bulging tip of clear base when trying to get a decent amount on glitter. I was considering moving to standalone glitter, but now I can keep using all the polish ones I have. Thanks so much.
I’ve been tempted to move to loose glitter too, but it’s hard to find cheap solvent-stable glitter! Hope this works well for you 🙂
What a great idea! Thanks for the tutorial.
Glad you found it useful! 🙂
great tutorial! i’ll have to try this method next time!
Thanks! Hope it works well for you.
I’ve always wiped the brush so it’s a bit more dry but I might try this one out x
I used to do that too, but the thick polish still annoyed me!
Wow excellent, and so timely! I just received yesterday some fantastic new glitters from Darling Diva (after seeing her products HERE) and now I’ll be able to use them more effectively
Thanks, hope you like the result 🙂
Great idea!
What color Emily de Molly is that? I must have it!!
I don’t think it’s in production anymore unfortunately!
Thanks…I may have found it—is it called Enchanted Forest? That manicure is gorgeous!!