This is going to be a long post! This was my first attempt at doing a dry water marble, and I learned a LOT, so I decided to record absolutely EVERYTHING, even the things that should be really obvious. It took me hours despite reading everything I could get my hands on. Hopefully this will help any water marbling newbies out there 🙂
Dry water marbling (a la this tutorial on More Nail Polish) is less stressful and time-consuming than the traditional method, since it’s spread over two sessions and there’s no nail polish drying on your nails while you’re trying to do a million other things.
Learn from my (many) fails!
1. Water Marbling
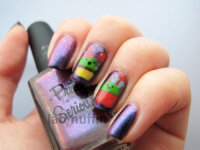
I used the bottom half of a polystyrene cup, filled with filtered water. I ended up using China Glaze Awakening and Wagon Wheel after trying out a lot of polishes. If you haven’t already, check out My Simple Little Pleasures for expert dragging videos.
– Polishes that dry quickly are a no-no. This means I basically can’t use any of my beloved ulta3s (sob). They wrinkle when you drag a toothpick through them, and the polish doesn’t “spread” the same. (I’m thinking of changing the solvents in the ulta3s to slower drying ones in the future since 90% of my collection is ulta3.) Basically – if it wrinkles, give up.
– Drop the polishes onto the water gently i.e. close to the surface. I actually touched the droplets to the water gently. If you drop them from too high up the drop will sink to the bottom and make a hole in your cup, and suddenly your lap will be full of water.
– Don’t start dragging from outside the “circle” of polish. Dip your pointy stick in the middle of the outer band of colour. Otherwise your pattern will start rotating around your cup uncontrollably.
– Drag smoothly at a constant speed to minimise “wiggle”.
– If your first drop of polish doesn’t “spread” right (looks more like a star than a circle), run your pointy stick around the edge of the cup and it should expand nicely. (Some people use a drop of polish to “clean” the surface… I felt like it was a waste 🙁 )
2. Picking Up the Design With Plastic
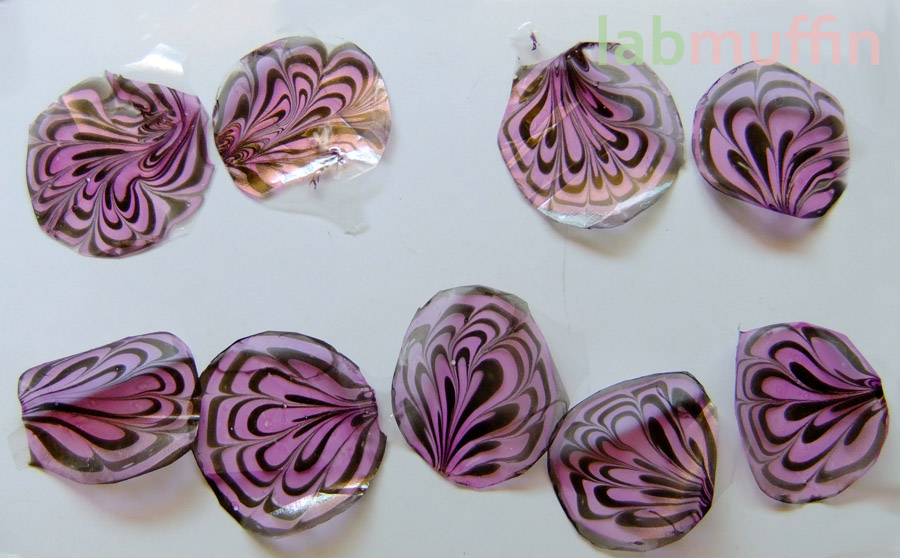
I used 4 cm wide circles with little tabs cut from old plastic document sleeves.
– Lifting the plastic from the water very slowly and smoothly will minimise water droplets (I originally thought fast would be better… no)
– Leaving the plastic in the cup for a bit before you lift it out helps prevent the pattern folding over.
Transferring the Dry Design
I did one nail at a time. With practice, maybe I can do a few at once, but not for a while in my case…
– Store the circles carefully – if they move around too much, the polish will flake off, and if you put two dried polish surfaces together, they’ll stick and you won’t be able to separate them.
– Cut little rectangles of nice design to fit over your nails. I could get 2 or 3 out of each circle.
– Paint a nail with base polish and let it dry for a few minutes. I used Awakening again.
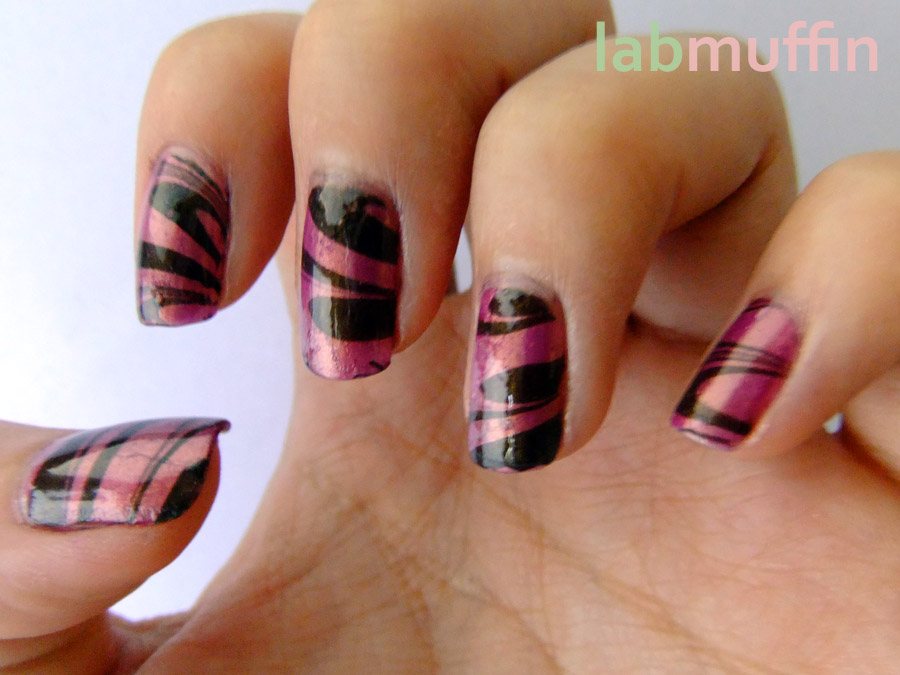
– You want the layer of pattern that’s closest to the plastic to be dry when you peel the plastic off. That means you have to either: 1. work quickly so the new polish doesn’t re-wet the pattern, or; 2. wait ages so it all dries before you peel it off. I’m impatient, so I picked the first option, but I worked too slowly a few times and the patterns got wet and separated like pizza cheese (see e.g. side of right thumb).
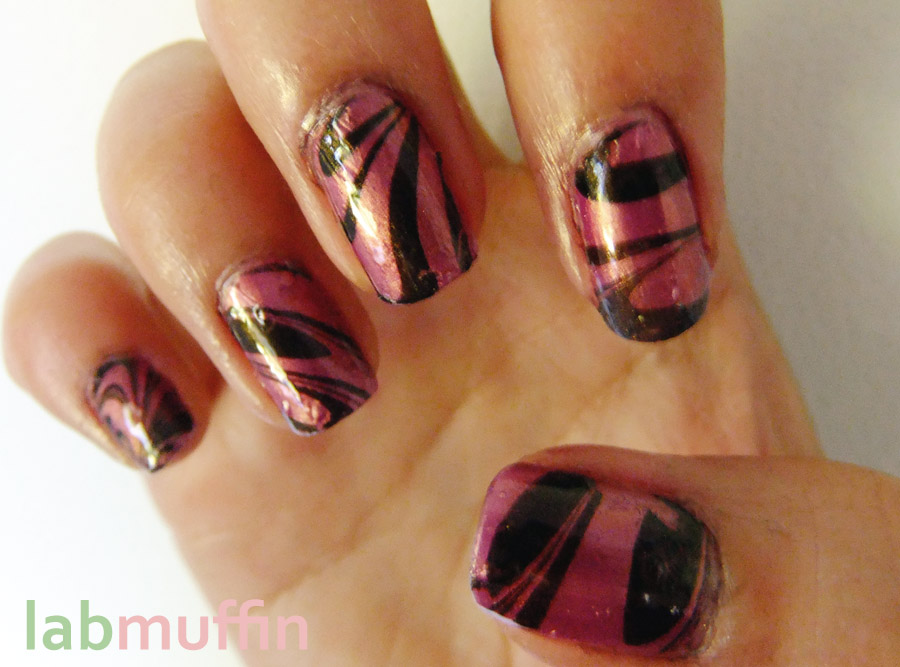
– My nails are more like bits of globes rather than bits of cylinders, so the flat pattern didn’t stick perfectly onto the nail. Putting top coat on helped stick the patterns on, but putting on Seche Vite immediately caused crazy bubbling (see e.g. right hand). Sally Hansen Insta-Dri, then Seche Vite seemed to work better (see e.g. left hand)
– Peeling the plastic off quickly is harder than it sounds! Separating a corner of polish from the plastic before putting the pattern on the nail made it a lot easier.
– I tried to use a nail file to file off the pattern that was hanging over the free edge, but using a clean-up brush loaded with acetone is more foolproof.
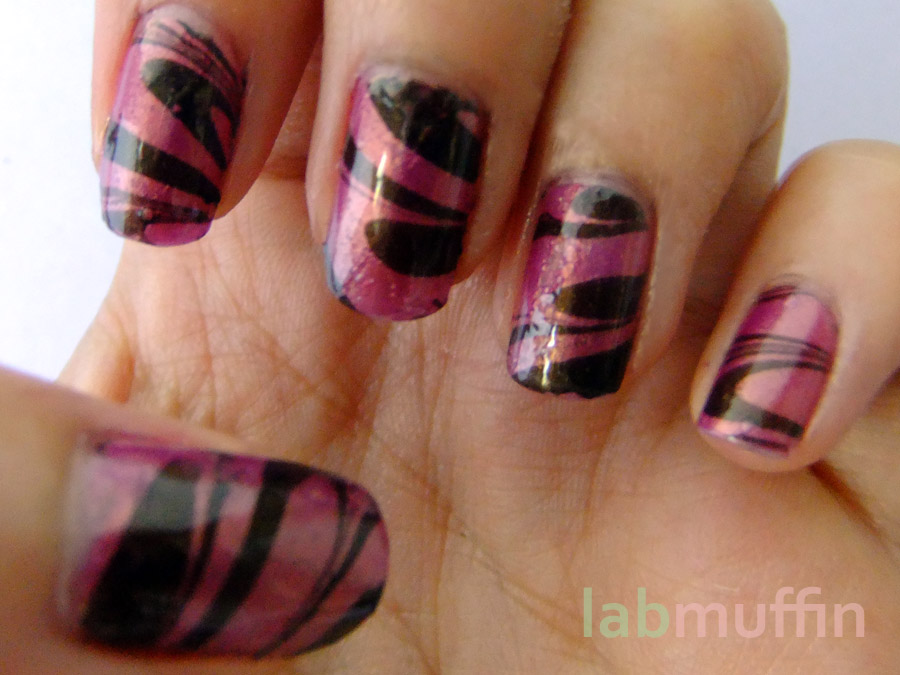
It’s not perfect, but I think it’s pretty good for my first attempt – hopefully I’ll improve next time!


I really need to try this out, looks great 🙂
I’ve gotten so many compliments on it, definitely an eye catching look!
I’ve tried reg water marbling but never this way. It seems like a home made version of nail polish strips. I really like how your turned out.
It’s a lot less stressful than normal water marbling! Thanks 🙂
That’s interesting! I’ve never heard of a dry water marble before. I’ve done a couple of water-marbled NOTD before on my blog! But I’ve used Ulta3 in one of them? Love water marbling. It’s a lot of effort, but the designs look great 🙂
I think some of the slower-drying ulta3s would work, especially if I had more practice and could work quicker… but I couldn’t be bothered going through my whole collection! I’ve seen some of the neon ones used before, but all the ones I tried (from memory: Gold Rush Fever, Sizzling Red, Twilight Fever… and a few more) dried way too quickly, which is usually what I look for in a polish, just not for marbling!
I’ve read about this method but never tried it. I think I will try it next time I want to attempt water marbling again. 🙂
I think water marbling is one of our later nail art challenges 🙂
Cool! This is a good job, haven’t tried this before.
Thanks! It’s definitely worth a go!
That’s fantastic for a first try! Mine were awful – I’ll have to attempt it again soon
Thanks! There was a lot of trial and error – I’m very glad that I did the transfer method, my first designs were terrible!
I love the colour combination. It’s unexpectedly pretty!
It is, isn’t it? They were just the two shimmery China Glazes I had on hand… it’s kind of like military Barbie!
wow this looks so awesome! ill have to try this method
Thanks! 🙂
looks great!
Thanks! 😀
Wow, very helpful! Thank you =]
🙂 Good luck!