It’s the second part of my soap making post! Last time we looked at the chemistry behind soap making (also called saponification) – today we’re looking at how to actually make a bar of soap, using ingredients from the supermarket.
Related Post: Make Your Own Soap! Part 1: The Chemistry Behind Soap Making
From the previous chemistry post, we know that we’ll be mixing some oils with sodium hydroxide to form glycerin and soap molecules, which will both be in the final bar.
The overall chemistry equation is simply:
There are a few different ways of running this reaction. I tackled the simplest version – cold process soap making.
Getting supplies
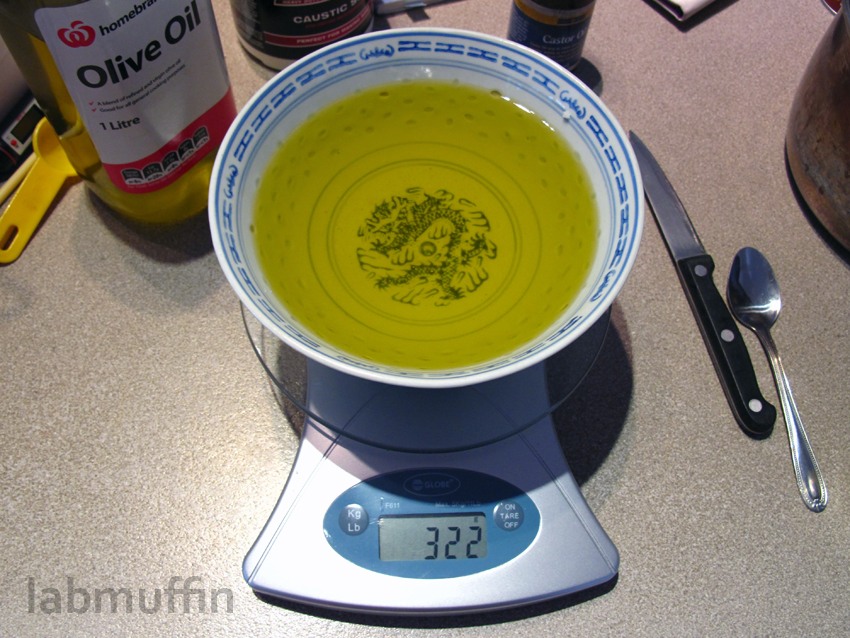
I picked some widely available oils for this project – coconut, olive and castor oils. Coconut and olive were in the cooking section of my supermarket, while castor oil was in the laxative (ergh) aisle in my local pharmacy. Coconut oil has a lot of saturated fatty acids (you can tell because it’s solid at room temperature), while olive oil has been used for making Castile soap for centuries. Castor oil will help the soap lather nicely.
Palm oil is usually recommended for soaps, and results in a hard bar (this is because it’s full of palmitic acid, a saturated fatty acid). However, in Australia at least, it’s hard to find palm oil at all in the regular supermarket (because it’s pretty bad for you – saturated fats!), and even harder to find sustainably produced palm oil that doesn’t contain the metaphorical blood of a thousand baby orangutans. So I settled for a softer soap for this project, but if you’re interested, you can get palm oil that’s touted as sustainable from cosmetic formulating suppliers like Aussie Soap Supplies and N Essentials.
Related Post: Why Has the FDA banned Antibacterial Soap?
Sodium hydroxide is found in the form of caustic soda in the cleaning aisle – my tub of Mechanix helpfully announces that it’s “perfect for making soap”.
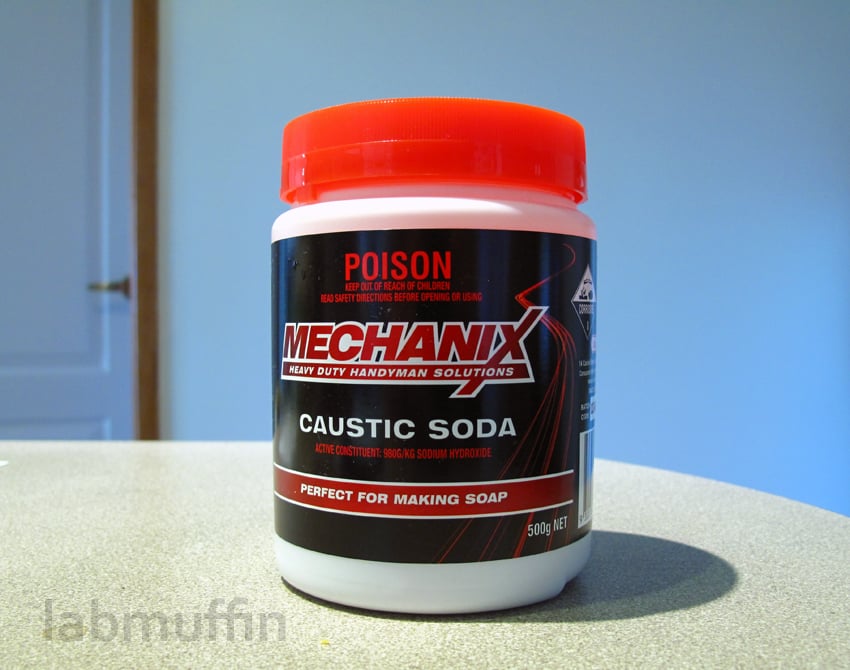
Whatever the brand of sodium hydroxide you’re using, it should come as a solid. If it’s liquid, it’s probably diluted beyond what we need for soapmaking (and may contain unwanted additives, other than water).
Oil and sodium hydroxide are the only two essential ingredients for a soap, but I also wanted my soap to smell and look pretty, so I also used some lavender essential oil and red food colouring. Soap is quite a harsh cleanser, so I also ground up some soothing, moisturising oatmeal in a coffee grinder to add to my soap – this also makes it a tiny bit gritty, which is good for exfoliating.
How much do I mix?
You can play around with proportions and properties on a soap calculator. I ended up with this recipe, (although next time I’ll be using a higher percentage of coconut oil, which I’ll explain later):
Chemicals
- 80 g coconut oil
- 300 g olive oil
- 20 g castor oil
- 55 g sodium hydroxide (lye discount of 5% to stop ourselves from burning skin off)
- 150 mL water
- 0.2 g lavender essential oil
- oatmeal and colouring as needed
Equipment
- 1 heat- and base-proof container for mixing sodium hydroxide – stainless steel, high quality Pyrex glass or polypropylene plastic are good
- 1 heat- and base-proof container for mixing soap – a stainless steel saucepan or polypropylene plastic bowl are good
- 1 stick blender or stainless steel mixing implement (if you’re not using a stick blender, be prepared for sore arms!)
- a bunch of stainless steel or plastic spoons (I can’t remember how many I used, but you can always use just one and wipe it down with a damp paper towel between chemicals)
- a bunch of ceramic bowls for measuring (again, I tend to use a million containers, but you can get away with just the one)
- kitchen scales
- soap moulds (I used a Pringles can, milk cartons and silicone muffin pans, but there are lots of other ideas you can find online)
- protective equipment (for handling sodium hydroxide, both on its own and in the raw soap)
IMPORTANT SAFETY NOTE! Sodium hydroxide is a strong base, and even when dissolved in water for this recipe, it’s very concentrated and has an extremely high pH. This means that if you get it on your skin or in your eyes it will hurt, and if you leave it for too long, it can cause permanent damage. Additionally, dissolving sodium hydroxide in water generates a lot of heat.
To stay as safe as possible, there are a few things you can do:

– Use safety goggles to protect your eyes from splashes. If you don’t have proper safety goggles, you can use swimming goggles, lightly tinted sunglasses or even novelty glasses instead. There won’t be any flying objects, so they don’t need to be especially durable. Wear them every time you have sodium hydroxide out in the open – splashes always happen when you least expect them.
– Use plastic gloves to protect your skin from stray sodium hydroxide. Sodium hydroxide pellets are small, and the solution looks just like water, so it’s very easy to accidentally brush against it. Rubber washing up gloves are tough and durable, but it can be hard to move in them. Nitrile surgical gloves are my personal favourite. You can buy them from pharmacies.
– Wear clothes that you don’t mind getting ruined by splashes of sodium hydroxide.
– If you do get sodium hydroxide on your skin or eyes or anything you don’t want ruined, rinse it immediately with lots of cold water. I’ve gotten splashes of acids and bases on my skin many times, and have never suffered anything worse than a slight tingly itch, because I’m very quick at getting to a running tap to dilute the crap out of it. I highly recommend that you work right next to a tap – the kitchen is perfect.
– When mixing the sodium hydroxide solution, add the sodium hydroxide to the water, a little at a time with stirring. It will get hot! You can also use ice instead of water to cool it down further. Make sure the container is heatproof and is resting on a heatproof surface. I used a Pyrex beaker, but you can use ceramic or stainless steel as well. Be careful if you choose to use glass, as it can shatter from uneven heating, and there’s a lot of non-Pyrex glass labelled “Pyrex” going around these days.
– The reaction between the sodium hydroxide and the oil will also generate heat – again, make sure it’s on a heatproof surface and in a heatproof container. I used a stainless steel saucepan sitting on my unlit stove.
Onto the fun part – mixing everything up!
Related Post: High School Science Investigations Involving Cosmetics
Procedure
Soap making is not the simplest procedure – there are lots of things to prepare and mix in a specific order, and once the soap is at trace you’ll need to work quickly. It’s one of those things where you need to read and understand the recipe well before you start. I’m a bit of an overplanner, and drew up some pretty complex flow diagrams before starting, though I ended up improvising a bit as I went.

Step 1: Weigh everything out.
I used (slightly inaccurate) kitchen scales, and measured everything out in ceramic bowls. I used stainless steel spoons for the solids. Be careful with the sodium hydroxide – the pellets tend to be a bit small and jumpy if there’s static electricity, and use your protective equipment! Wipe down the area with a damp paper towel afterwards if you think any pellets have gone astray.
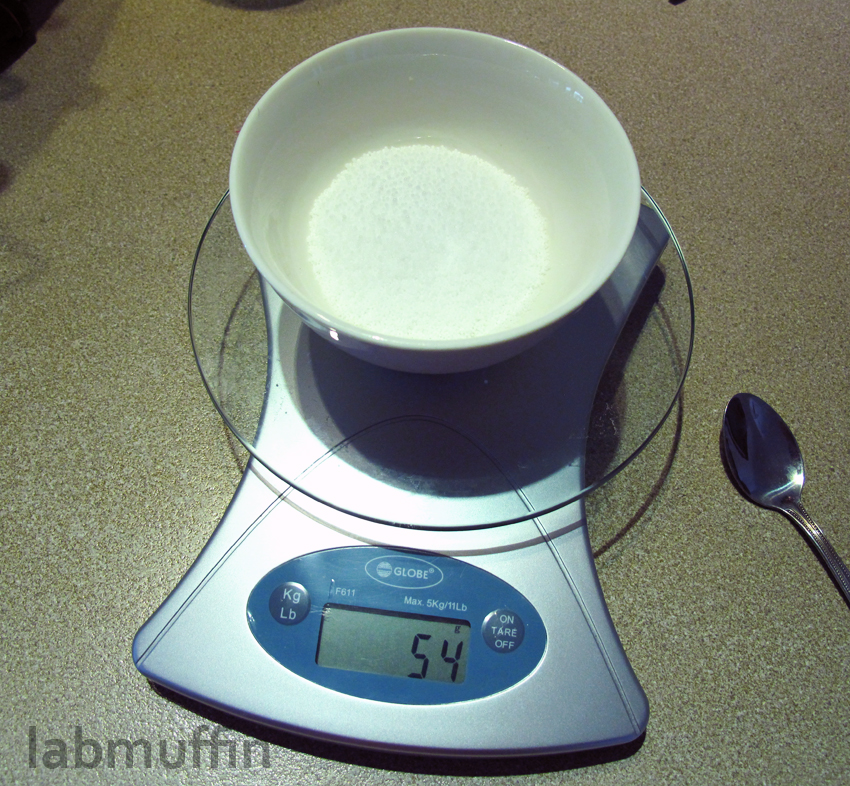
Step 2: Add sodium hydroxide to water.
From the safety note earlier, remember to use protective equipment, add a little at a time, stir it frequently, let it cool down in between additions, do it on a heatproof surface in a heat- and base-proof container, and rinse your skin or eyes immediately if it gets on you, in either solid or liquid form! Also be careful not to dip a wet spoon into the dry sodium hydroxide – it will get very hot, and there won’t be enough water around to spread the heat.

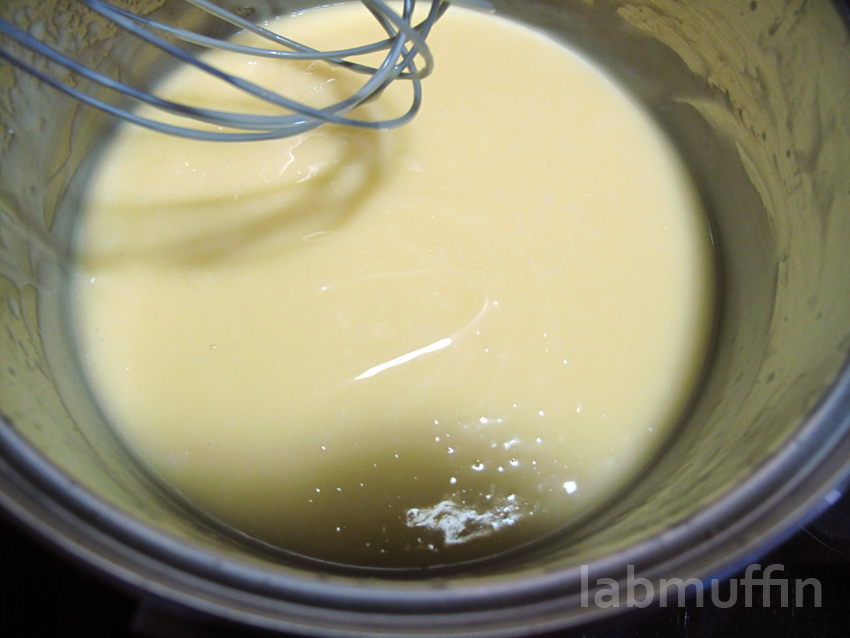
I used 2 separate stainless steel spoons for this part, and a 250 mL beaker. I added a small spoonful at a time and stirred, then waited until the solution was clear before adding more. I think it took me about 15 minutes to finish adding all the sodium hydroxide. In the photo above, the solution is cloudy, which means it’s not dissolved completely – you’ll known everything is completely dissolved when it looks like water.
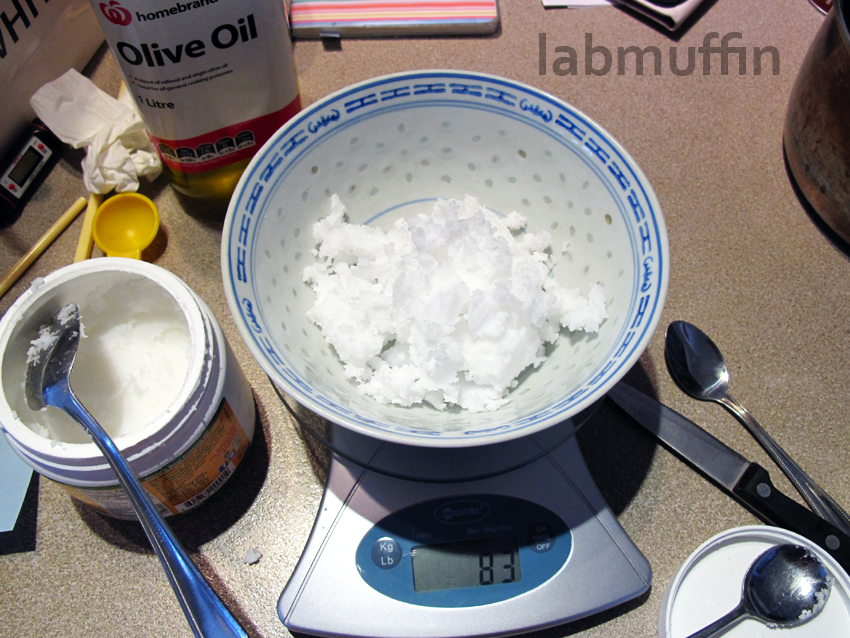
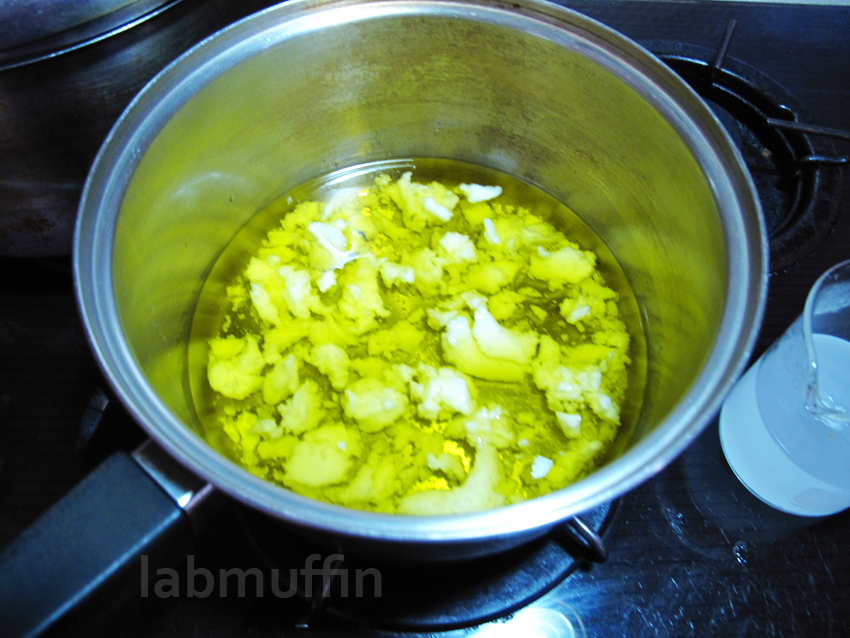
At the same time, melt the coconut oil if necessary and combine the oils.
Winter = it was necessary. I heated the oil mixture on low heat until there were no solid chunks left.
Step 3: Let everything cool down.
This is the boring bit – you want the oil and the sodium hydroxide solutions to be about 40-50 °C (104-122 °F) before mixing.
Related Post: Eco Friendly Products? Zero Co Review
Step 4: While you’re waiting, prepare your moulds.
If they need preparing, that is. The silicone muffin pans and waxed milk cartons were fine by themselves, but Pringles cans are lined with plastic that can bubble and warp, so I lined it with some baking paper, kept in place with a generous smear of Vaseline.
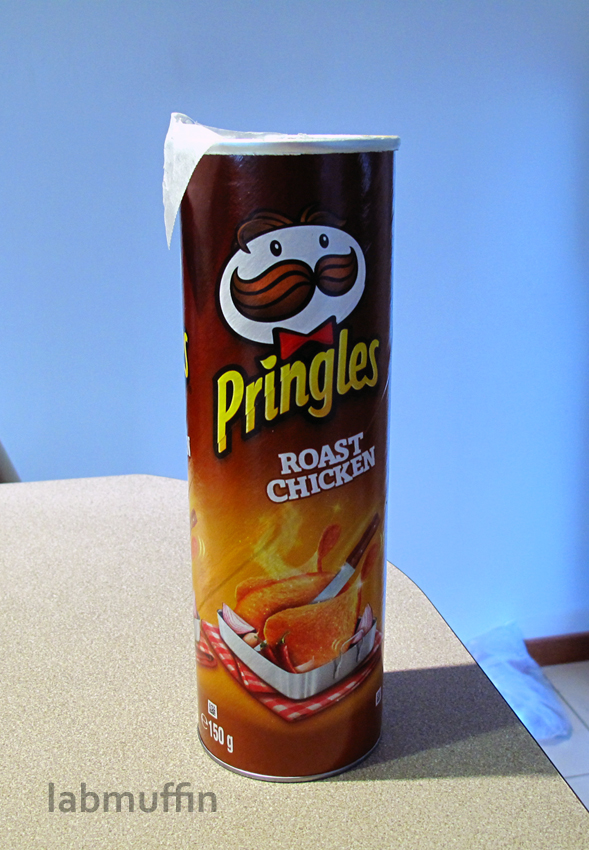
Mmmm, chicken soap.
Step 5: Add the sodium hydroxide to the oil mixture.
Once the oil and sodium hydroxide mixtures are cool enough, it’s time to react! Pour the sodium hydroxide into the oil mixture.

Step 6: It’s time to start mixing!
I started mixing with a stainless steel whisk, but quickly switched to the stick blender. With a stick blender it takes a few minutes of mixing to get to trace, but with a whisk or spoon it can take half an hour, which is quite tiring (try to recruit some volunteers if you can).
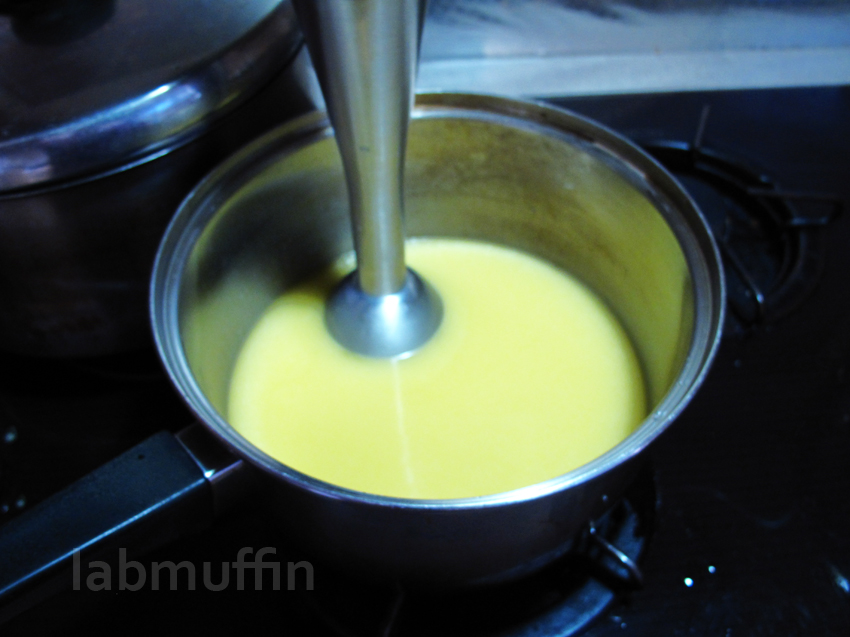
Use the stick blender in short bursts. Stick blenders are known to die if you leave them running continuously for too long. You’ll see the oil droplets disappear and the whole mixture start to look milky. Be careful of splashes – that’s the main reason a handheld mixer isn’t recommended for soap making.
Step 7: Stop when it gets to trace.
Trace is when the mixture thickens, like custard. When this happens, you’ll start to see traces of lines left on the surface. With a stick blender this can happen very quickly, so I started whisking by hand when it started to thicken.
Step 8: Add colours and scents, and anything else, then pour.
Here’s where you can get up to all sorts of fun! I made two batches of soap and kept it simple since it was my first attempt.
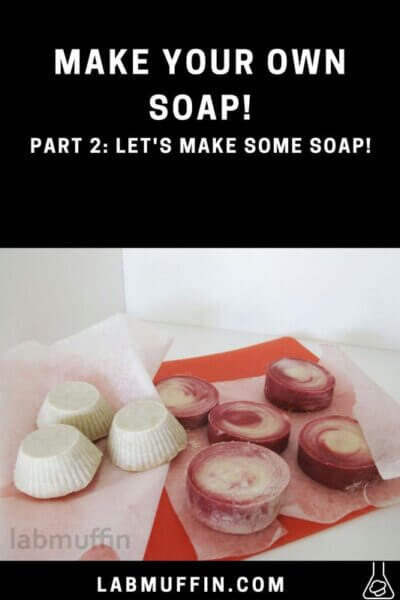
a. Marbled soap
I based my procedure on this post from Soap Queen, but simplified. Once my soap mixture was at trace, I added the lavender oil and mixed thoroughly. Next, I poured half into a bowl, and added some red food colouring… which turned it chocolatey brown.
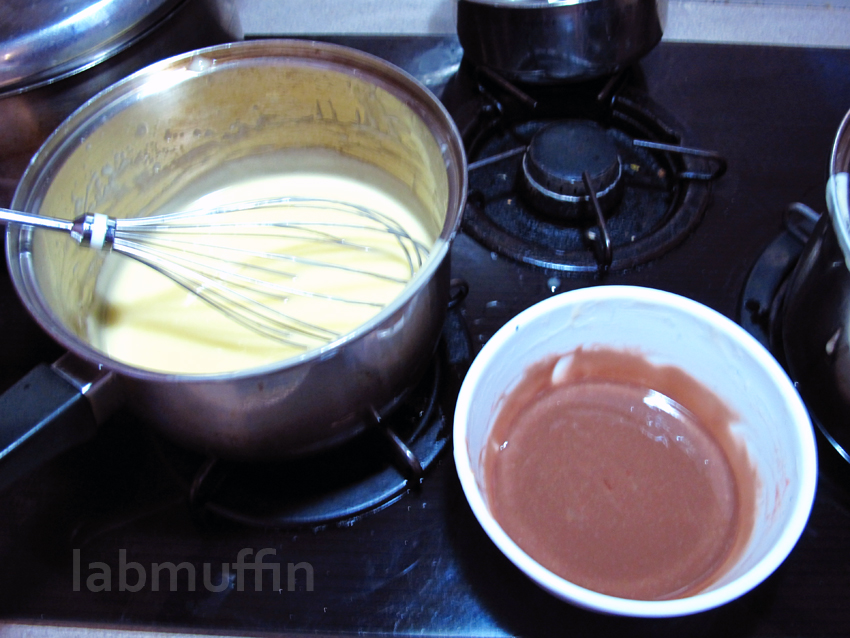
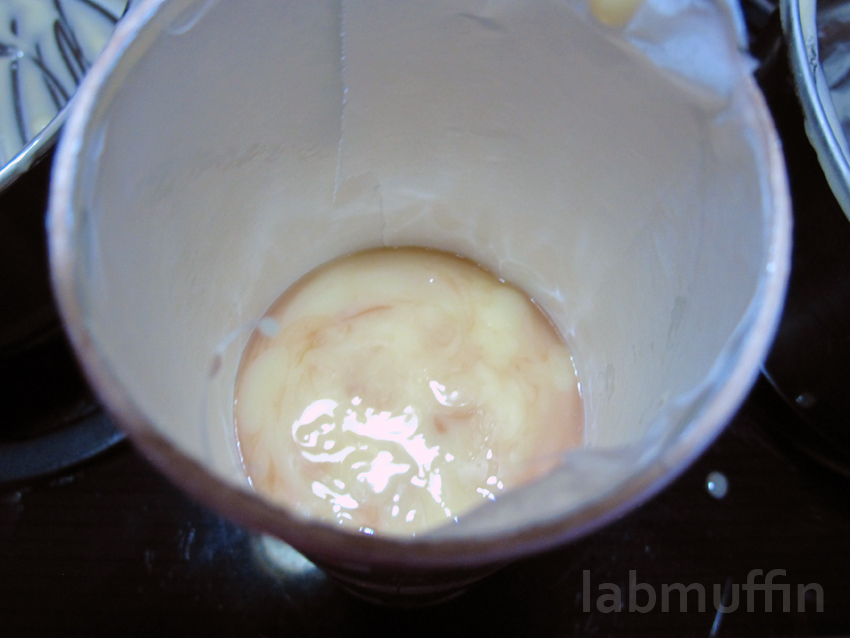
I poured the brown soap back into the main saucepan, gave it a gentle stir with a chopstick, then poured it into the Pringles can. 400 g of oil filled the can about halfway.
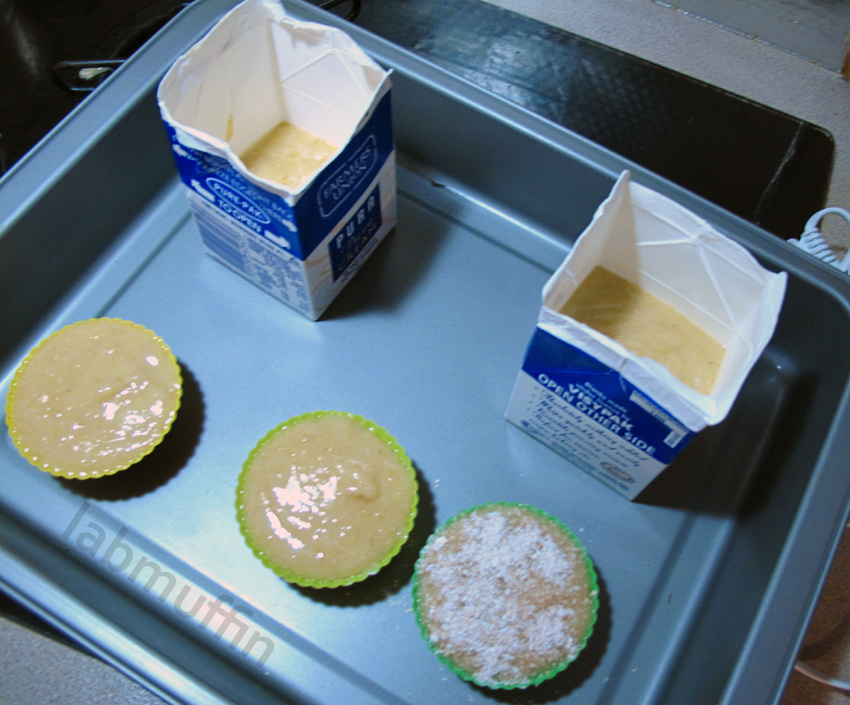
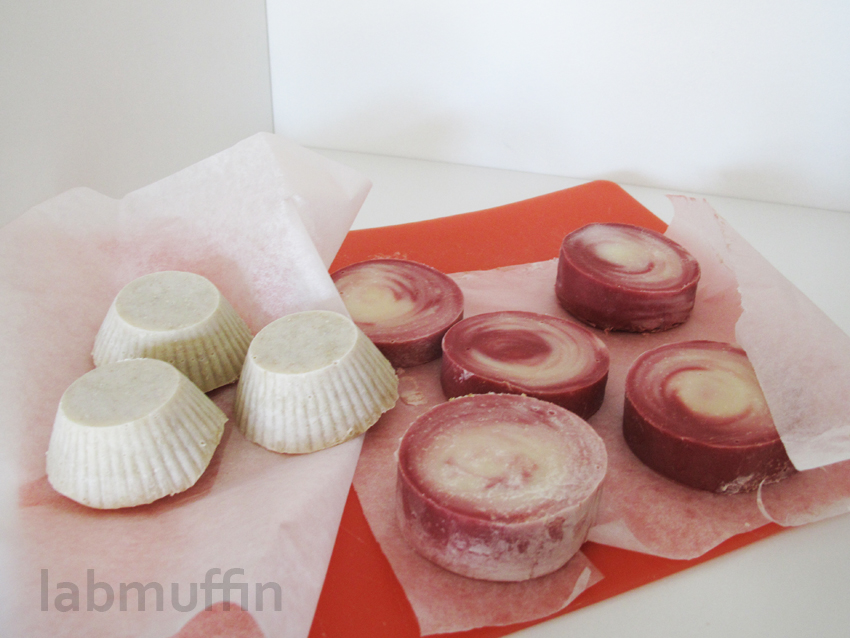
b. Oatmeal soap
The oatmeal soap I made was super simple – at trace with my second 400 g batch, I added the lavender essential oil, then 4 tablespoons of ground oatmeal. I then ladled the soap into my moulds. In the lower right hand corner you can see my experimental soap decorating, which is kind of hard when you’re only decorating with oatmeal…
Step 9. Let soap stand for at least 24 hours, until firm.
There’s a lot of waiting around in soap making.
Step 10: Remove from moulds and cut into bars.
When the soap is firm enough to remove from the moulds without them losing their shape, you can unmould them! The soap is still very alkaline at this point, so use gloves, wash your hands etc. I used a thin cleaver for cutting the soap.
Related Post: Getting Hair Dye Off Your Hands
Step 11: Let cure for 3-4 weeks (or more).
A LOT of waiting around. Curing just means letting it sit there for a while. There are two reasons for this:
1. The saponification reaction is slow (24-48 hours for all the sodium hydroxide to be used up).
2. Water needs to evaporate. If there’s too much water in the soap, it will get mushy quickly and lather badly.
Here’s my soap curing:
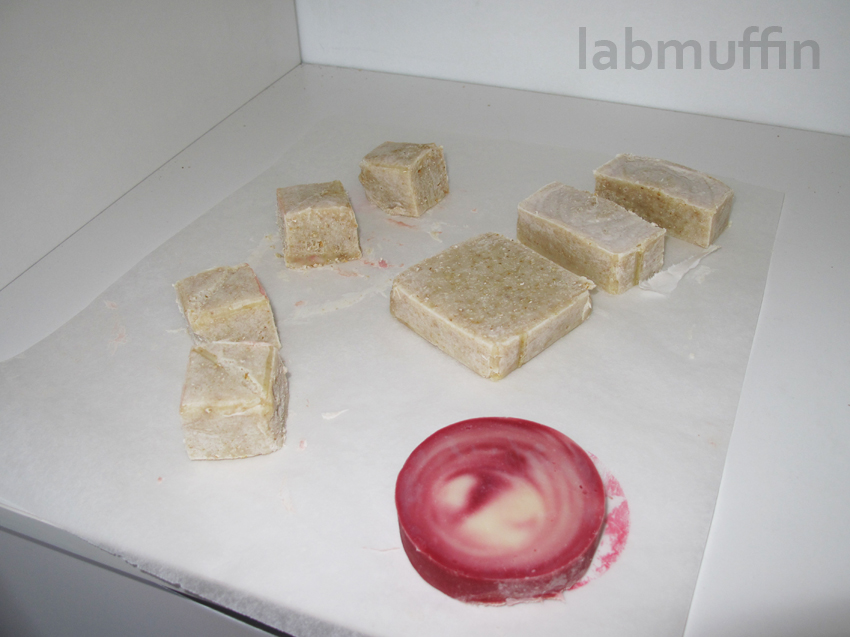
Notice something different? The chocolatey brown is gone and it’s now deep red! It turns out that the food colouring I was using (E124) is a pH indicator – it’s brown at very high pH, and turns back to the original red when the pH drops (i.e. when the lye gets used up).
You can also see a white dusty coating on the soap in the bottom picture – this is sodium carbonate, or soda ash. It forms when the sodium hydroxide in the soap reacts with carbon dioxide in the air, but it doesn’t affect the soap much apart from making it look a little ugly. To prevent this from happening, you can try spraying the soap with isopropyl alcohol (rubbing alcohol). To clean it off, you just have to dip it in some water!
Step 12: Use soap!
Finally! How did my super basic homemade soaps compare to store-bought soap?
– Very gentle – My skin didn’t feel dry at all after using my soap. It’s probably due to the extra oils, and the extra glycerin.
– OK lather – It took a while to work into a lather, which is the tradeoff for having such a moisturising soap.
– A bit too soft in water – Cold process soap is known to go mushy easily in the shower if you don’t let it drain properly. I didn’t have a soap dish with drainage holes here in Europe, so my oatmeal soap ended up… potato-looking.
This is the biggest drawback to not using palm oil! Next time I’ll be trying a higher proportion of coconut oil to try to get the saturated fat content up, to get a harder soap.
Soap making resources
There are hundreds of great soap making websites and blogs online! Here are just a few of my favourites that I’ve come across:
Soaping101 is a YouTube channel with lots of easy-to-follow videos and interesting recipes.
Teach Soap has a stupid amount of info on everything soap, ever.
Soap Queen has an incredibly comprehensive archive of soap info, and lots of pretty designs – this beginner’s guide is excellent.


Thanks, this was really neat. I like to make soap, but I cheat and use the pre-packaged soap supplies so that I don’t have to mess with lye. I love it when people go through the whole process, but I usually leave it for my craft books. I love the way yours turned out and the pH color change was really cool to see.
Thanks Aimee! I feel so badass messing with lye in my kitchen 😀
Love this method. Will steal it for senior chemistry lol.
I remember getting some NaOH solution on my hands and I couldn’t get that slippery feeling out for ages under running water haha
Do it! I think I’ll be using this for teaching next year – make soap in week 1 and here’s some I made earlier! 😀
I would love some information about how often you need to use active ingredients such as retin A, vitamin c, serum, apple stem cell serums, wrinkle inhibitors, chemical exfoliants, etc. I often wonder if product directions advise you to use it more frequently or more generously than you actually need to for maximum benefit. I also wonder about using chemical exfoliants more frequently than directed and leaving them on the skin longer than directed. I would love some info and/or experiments about this kind of thing!
I’ve never seen such a good explanation on soap makin’. Congratulations! Im studying Chemical Engineering (Peru), already passed my Organic Chemistry class and still I have to say I learned a lot from you. Keep doing these awesome posts.
You’ve got a good starter recipe here. Add 10- 15 % cocoa butter or tallow for the palmitic acid which creates a hard bar that last longer in the bath. And use 30% water instead of the usual 38%. A good guide to go by when making a recipe is a 50/50 mix of solid butters and liquid oils.
Hello! Thank you for this! I’ve been playing around with the idea of making my own soap as well.
Would a borosilicate beaker work for the Lye? I heard some Pyrex now is just Soda Lime Glass, so i feel uncomfortable trusting cookware to such a strong a stong alkali.
I also have a question about cleanup. Would you suggest neutralizing any traces of the lye on the container with vinegar before washing?
TIA
There’s always a small possibility of degrading glass with base, although the risk is usually small – stainless steel might be safer!